macOS Monterey

Earlier this week at Apple’s special event (unveiling speedy new MacBook Pros) we learned that macOS Monterey will be released early next week on October 25.

If you plan to upgrade to Monterey please make sure that you have the latest version of Nisus Writer. So far as we know Nisus Writer Pro 3.2.2 and Nisus Writer Express 4.2.2 are compatible with Monterey; earlier versions may not be functional.

Please let us know if you see any issues with Monterey or otherwise. We’re always happy to help!

Thanks Apple, I Hate It: Mail Sidebar

Apple Mail has been a relatively reliable app on macOS for a very long time. Well, that wasn’t always true, but it’s a work horse one way or another. For the most part it does what I need (except searching emails, but for that there’s InfoClick).

One aspect of Mail that Apple seems eager to tweak every couple years is the sidebar showing your accounts and inboxes. I think the Mail sidebar on macOS Big Sur is actually relatively straightforward considering some of the confusing messes Apple Mail has showcased over the years. But let me complain about this for a hot minute:

The “On My Mac” area has always been reserved for emails that are only stored locally, i.e. those not stored in the cloud. How the heck am I supposed to tell all these Trash folders apart? I have several accounts with local storage and there’s no labeling to disambiguate them. I’m forced to blindly click between the folders to stumble on the right one.

This is a tiny annoyance, but I still hope it gets improved. Maybe in macOS Monterey, which is likely to be finalized soon. We should know more about Monterey’s release date after the Apple event next week.

Apple’s March of Progress, circa iPhone 13

You probably already know that the iPhone 13, iOS 15, and Safari 15 have arrived. If you’re considering a nice new iPhone I thought this guide comparing the iPhone 13 to older models is a great help. You can jump to the section for your current model and see a quick summary of the top benefits.

We here at Nisus prefer stability and consistency to the hot new thing. Personally I’m not itching to upgrade. I have a perfectly good iPhone 11 and I like it when my web browser tabs look like tabs. Maybe Apple will walk back the much hated tab design in Safari 15. But this is Apple, so I wouldn’t hold my breath.

That said we’re not oblivious or unprepared for change. Although Apple has yet to finalize the forthcoming macOS Monterey, we released Nisus Writer Pro 3.2.2 and Nisus Writer Express 4.2.2 last week to ensure our apps remain compatible.

My one temptation: the Apple Watch series 7 that’s available to order starting today. I still have a series 3 which performs admirably, but the incentives to upgrade are starting to pile up 🥕

Nisus Writer Updates

We are happy to announce the release and immediate availability of Nisus Writer Pro 3.2.2 and Nisus Writer Express 4.2.2.

These updates have plenty of fixes and enhancements for your writing pleasure, including preliminary macOS Monterey compatibility (pending Apple’s final release) and Bookends 14 compatibility. You can read the voluminous changes in our Nisus Writer Pro release notes or Nisus Writer Express release notes.

These updates are free for existing owners of the current version of each app. You get the update from inside the apps, the Mac App Store, or our website.

Issues with macOS Monterey and Bookends 14

Nisus Writer has issues with two recently released pieces of software:

1. The latest beta/preview version of macOS Monterey. Nisus Writer will often crash due to changes in the macOS system.

2. The recently released Bookends version 14. Nisus Writer can’t communicate directly with this version of Bookends due to internal changes in how the app identifies itself.

We are working on a software update to Nisus Writer that addresses all of these issues. We hope to finalize and release those updates soon. However, if you need to bypass these problems immediately please contact us about obtaining early access to a private beta version of Nisus Writer.

UPDATE: These issues have been resolved in Nisus Writer Pro version 3.2.2 and Nisus Writer Express 4.2.2.

File Conversion Failures due to Permissions

We’ve recently had more reports that Nisus Writer Pro users can’t import or export file formats that require conversion (e.g. DOCX). The error message states that “you do not have permission” to run the Nisus File Converter app. The alert looks like this:

This is caused by a bug that was introduced in recent versions of macOS Catalina and Big Sur. It affects not only Nisus Writer’s file converter, but also other kinds of helper apps. Apple has a support page for affected scanner software. MacRumors reports that apparently Apple will fix the problem in a future system update.

To quickly bypass the issue you can click the “Retry” button in Nisus Writer Pro. That will use a backup converter built into macOS. However, be aware that this backup conversion is less thorough and will omit special content like styles, comments, footnotes, etc.

You can fully bypass the issue by first manually launching the Nisus File Converter app in the Finder. Please see our FAQ for a precise list of workaround steps and more details on this issue.

How to Insert Overline Characters

In certain kinds of writing (e.g. mathematics or linguistics) it can be useful to insert characters with a line on top. This line is known by several names like an overbar, overline, or macron. Here are some examples of such characters:

ā ō n̅

You can easily enter such characters in Nisus Writer and other Mac apps.

How to type standard overline characters:
If you’re using a recent version of macOS like Catalina or Big Sur you can type several standard overline characters simply by holding down a letter key on your keyboard. As explained in Apple’s support document on typing accents, you hold down the letter key (e.g. the “A” key) for a few seconds. A popover will appear with several character variations:

You can now either click the desired character, or press the corresponding number key, to insert it.

How to add an overline to any character:
The standard keyboard only allows easy access to certain popular overline characters. But you can use a combining overline character to place a line over virtually any other character. Here’s how you can insert a combining overline:

1. Type the base character, e.g. the letter “N”.
2. Show Apple’s Unicode/emoji character palette. There are a variety of ways to do this. One way is to use the menu Insert > Special Character > Show Character Catalog.
3. The search field at the top of the character palette has focus. Type the phrase “combining overline”. (You could also just type “overline” but the results will show multiple lines and it’s hard to tell which one is combining)
4. Insert the overline by clicking it with your mouse, or pressing the Return key.

If you use overlines frequently you may want to add it to Nisus Writer’s special characters list. You can customize the list via the menu Insert > Special Character > Customize Special Characters. Once the character is added it will be available on the special characters menu and palette. That means you can optionally assign it a customized keyboard shortcut in our Menu Key preferences

Fondly (?) Remembering Clippy

It’s an unexpected thing to say, but I feel a certain amount of warm nostalgia for Clippy, one of the first virtual assistants, as found in Microsoft Office circa the 1990’s.

Oh sure I hated him at the time. He was basically worse than useless. I recall that my only interaction was to annoyingly dismiss Clippy’s popup window. But as they say, time is the healer and we must forgive our enemies.

The recent news is that Microsoft may supplant paperclip emojis with Clippy. That’s seems like harmless fun, so long as it doesn’t affect final output (e.g. PDF). Perhaps Nisus Writer should replace the bicep emoji with classic Nisus Man. I see a certain resemblance…

From Ancient Wax Boards to iPads

It’s interesting to think about what counts as “technology” for particular generations of people. We might consider Apple’s latest iPad Pro on the edge of what’s new in personal tech. But in centuries past wax boards (literally wooden frames filled with melted beeswax) may have been the exciting new writing technology:

“Wax boards can be seen as the iPads of yesterday … they all allow writing without ink, and the erasing and re-inscribing of written text as much as is desired.”

That’s from this article from the American Society of Overseas Research which goes into great detail about these wax boards and how they were used in ancient Near East regions like Egypt. It’s fun to think about how neat these boards must have been when they were first available. What’s new and exciting is always relative.

One tidbit that I found interesting is the possible “use of a release agent made from sesame oil, date syrup and ghee” to help prevent the stylus from sticking in the wax– delicious!

InfoClick 1.2.7 released

We just released a new version of InfoClick, our Apple Mail search app. It provides an unrivaled view into the contents of your emails. There’s no more guessing whether or not to trust wishy-washy Spotlight search results. And InfoClick is incredibly fast. You see results and what other search terms are still available instantly.

This new version is a maintenance release with minor updates, mostly to improve stability. It’s free for all existing InfoClick users.

More Accurate Email Date Search
One small improvement in InfoClick version 1.2.7 is its handling of dates. InfoClick allows you to find all emails in a particular year, month, or day. But unfortunately the date field in emails can be unreliable for a variety of reasons. One example: spammers regularly mark an email’s date as a few days in the future. The idea is that this will sort the junk email topmost in any listings.

InfoClick now handles these erroneous dates more intelligently. If an incoming email’s date is in the future, or otherwise seems suspect, InfoClick may choose to use more trustworthy date information. That might include timestamps recorded by email servers as the email was passed around the network, or the local time of arrival.

Nisus Writer and Custom Keyboard Layouts

A topic that recently arose on the Nisus user forums is whether or not Nisus Writer comes with any custom keyboard layouts. While we don’t provide any keyboard layouts, Nisus Writer does support all layouts that are available system-wide on macOS. That includes all the default layouts provided by Apple as well as any customized keyboard layouts.

To enable additional keyboard layouts (also called input sources) on your Mac you can visit the macOS system Keyboard preferences. You’ll see a host of keyboards available:

Once you’ve enabled a keyboard layout for your Mac you can use it all your apps. In addition Nisus Writer has special language features that can help you automatically switch the keyboard layout based on the language of your document text.

You can also create your own keyboards using tools like Ukelele or search for existing pre-made custom keyboards. For example, here’s a custom Yiddish keyboard layout for the Mac.

The sky is the limit when it comes to customizing text entry.

Multi-Key Keyboard Shortcuts

I’m a big fan of learning keyboard shortcuts. It’s nice to save time and avoid reaching for the mouse. Apple provides some basic macOS system preferences to customize keyboard shortcuts across apps, but Nisus Writer’s enhancements go much further.

Nisus Writer of course lets you customize the keyboard shortcut for any menu command. But an even bigger help are our multi-key shortcuts. You can choose whatever mnemonic is clearest to you. For example Command + H1 can apply the “Heading 1” paragraph style. To activate this shortcut:

1. Press and hold down the Command key.
2. Type the H key (press down and release up).
3. Type the 1 key (press down and release up).
4. Release the Command key (so it is now up).

Nisus Writer collects together all the pressed keys while the Command key is down and then matches the full shortcut at the very end, once the Command key is released.

Aside from activating any single regular menu command, you can also assign keyboard shortcuts to intermediate submenus. For example you might assign Command + OR to show the “Open Recent” menu. Once the menu is expanded on screen you can use the up/down arrows (or autocomplete typing) to select the desired submenu and open the corresponding file.

All these little tricks may take some small time to learn and set up, but once you do we hope you’ll see how much of a pleasure writing can be with Nisus Writer.

Big Sur is Dominant

For the first time since its official release in early November 2020, macOS Big Sur’s usage has finally achieved a majority.

The chart above shows Big Sur’s usage rate amongst all users of Nisus Writer Pro (for those that opt-in to sharing anonymous system metrics). You can see that Big Sur’s usage for March 2021 has finally reached 50% of all our users.

Should you update to Big Sur if you haven’t already? There are many considerations, but by most accounts Big Sur is one of the better recent Mac system updates. Especially when compared to Catalina, which was notoriously unstable and obsoleted a lot of software. If you’re still worried about making the jump you might read this Big Sur rundown from our friends at TidBITS.

Garamond Font Discouraged by U.S. Court

We all know the importance of using an appropriate typeface. This week courts in Washington, D.C. have officially placed Garamond on the naughty list:

the court has determined that certain typefaces, such as Century and Times New Roman, are more legible than others, particularly Garamond, which appears smaller than the other two typefaces

This is absolutely true. Garamond has a distinct aesthetic that can be nice to look at, but it is smaller and always felt a bit cramped to me with its tight kerning.

A very old version of the Nisus website actually briefly used Garamond for certain text elements. That was over 20 years ago! But it was probably always a poor font choice for a webpage.

Big Sur and Sandbox Folder Names

Apple made some changes to the file system for macOS Big Sur. The big underlying change is the new cryptographically signed system volume that prevents tampering with system data (for better and worse). There is also another little change to what you see in the Finder when you browse sandbox folders.

As you may know, every app that adopts macOS sandboxing is given its own sandbox folder. This folder holds all local information for the app, like your app preferences. If you don’t ever give a sandboxed app access to additional files or folders (eg: by choosing extra locations in file handling dialogs), then you can be sure that everything the app stores on your Mac is kept in its sandbox. It’s a great idea. Not only does it increase security, but it also makes apps easier to uninstall: just delete the app and its sandbox.

Each sandbox folder’s name corresponds to the app’s internal identifier. For example: Nisus Writer Pro’s sandbox folder name is com.nisus.NisusWriter. That’s perhaps a little obscure, but it ensures sandbox folder names are unique. All sandbox folders are stored in a single location on your Mac, inside your home folder at:

~/Library/Containers

Big Sur changes how container names inside that folder are displayed in the Finder. Instead of showing identifiers you’ll see actual app names. That is generally an improvement, but it does also create some confusion.

The above Big Sur folder listing shows the problem: apps with related services may have several sandbox folders, which now all display using the same name. There’s one for Mail’s Spotlight importer, another for Mail’s sharing extension, and so on. But there’s no way to know which folder is the primary sandbox for Apple Mail.

This impacts InfoClick, our email search app, because it’s no longer obvious which Mail sandbox folder stores your emails. The Finder and standard file dialogs on Big Sur simply won’t show you the real folder names. Luckily there is still a way to choose the proper folder using the Go To Folder command. You can still paste the folder’s path to ensure you select the proper folder.

Urdu and Digital Typography

There’s a lot of complexity that goes into the display of text. Text features like ligatures, small caps, and font substitution surface some of the complexity, even for languages like English whose Latin letters have been part of technology since the very beginning (ASCII encoding was standardized in the 1960’s). For languages whose letters and typography aren’t as simple as English things are much harder.

This article on digitizing the Urdu language explains the bigger challenges. It’s fascinating to read about:

The shape of each letter changes, depending on the letter that comes before and after … In 1980, Mirza Jamil wrote out every combination of Urdu letters that he could think of — roughly 20,000 by most accounts.

The traditional nastaliq script also requires that letters change their height based on their position within a word. There’s a slant to everything, so the text looks like the “wings of flying geese”. You can see the slant in this sample image of nastaliq:

It’s wonderfully artistic, but a difficult writing system for fonts and technology to properly handle.

Extract Text from Images

Nisus Writer recently added a feature that allows you to extract editable text from your photos, scans, PDFs, and other images. This process is often called optical character recognition (aka OCR).

Let’s see how text extraction works using a COVID relief notice I recently received from the United States government:

Once the image is in Nisus Writer Pro document, select it and use the Extract Text From Image command to generate an editable text version of the image:

Most of the text is correct and in sequence. There are a few minor errors and text misplacements, like the number 6 appearing before the title– perhaps caused by the Treasury Department’s seal alongside the main textual content.

Let’s try a few others images, like this paperback book and store receipt:

Overall pretty good! Usually editing extracted text is a better starting point than retyping something entirely.

The accuracy of the extraction will depend on a variety of factors including the quality of the image, whether text is slanted or rotated, the language and words in the text, and your system version. Nisus Writer uses Apple’s machine learning capabilities to accomplish this task, and requires at least macOS 10.15 Catalina.

Hopefully you’ll find a good use for this new feature.

Jump Around Quickly While Writing

One of my favorite new features in Nisus Writer Pro 3 is the Go To Content command. Whenever I’m writing a reasonably complex document I often want to jump around it, to consult material from other sections or simply work on different parts of the text. Nisus Writer has a Navigator sidebar that can aid in this task, showing key document structure like the Table of Contents or Bookmarks. But I wanted a faster workflow.

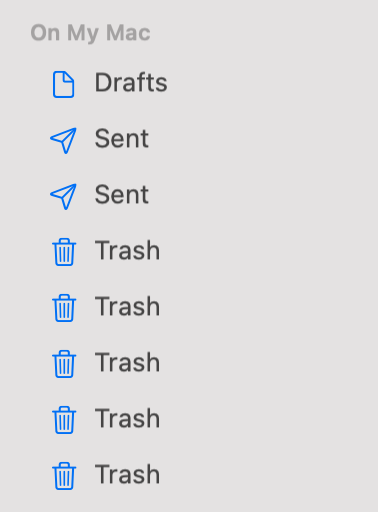
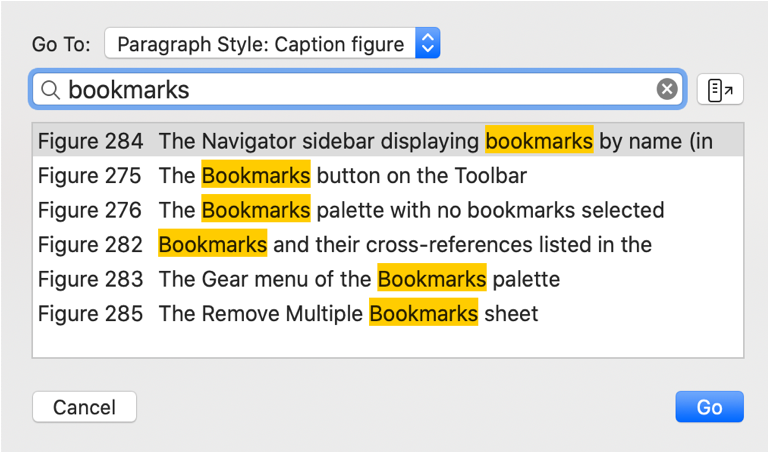
You can use the new Go To Content menu to see a list of available destinations, like all your Table of Contents headings. Or perhaps all text using a particular paragraph style:

This listing allows you to quickly filter by keyword or partial text, so you only have a few destinations to look through. This is a great way to find the desired heading (or other special content) and jump right to it.

Skip the Mouse
One thing I love about the new Go To Content command is that I can keep my hands on the keyboard the whole time. Using Nisus Writer’s multi-key shortcuts I’ve established a few shortcuts to trigger variants of the Go To Content command. For example: Command + GT for Go to Text in TOC, and Command + GB for Go to Bookmark.

Once a “Go To” dialog is open, it’s quick to finish the job via the keyboard:
1. Type a few keywords to narrow down the list of destinations.
2. Press the Down Arrow key to select the desired destination.
3. Press Return to jump to the destination text.

Okay, so maybe it doesn’t take that long to grab your mouse and click around, but it feels really great when you get something done using only the keyboard. You stay more focussed on your writing– in the flow. If you haven’t bothered to train your habits to reduce mouse usage, I suggest you give it a try. It can be a revelation!

Learn More
For more details on this new feature in Nisus Writer Pro, please see the Go To Content section of our user guide. It goes over some other details and tricks, like using the Go To Content dialog to produce a list of specialized search results.