
You can change any inline image so that it “floats” with the text. You can make text wrap around floating images, or you can make text appear in front of or behind them. You can fix a floating image to stay on a particular place on a specific page, or you can make them move with a paragraph.
☞ Floating images only appear when in Page View and only in the main portion of your document’s text: not in footnotes, endnotes, headers, footers, nor comments. If your document is set to Draft View and you cause an inline image to float, Nisus Writer Pro switches to Page View.
Delete shapes and floating images
You can select one or more shapes or floating images and delete them using the delete key.
However, it is possible to inadvertently delete shapes if you remove the text to which they are attached. Displaying the Shape Anchor as explained in “The Shape Anchor” on page 210 can help you be more aware of where your shape is attached.
☞ Shapes are attached to the entire paragraph, not the first character, nor the newline character at the end.
• You must delete the entire paragraph in order to delete the floating image.
• If you delete only the newline character that separates one paragraph with floating images from the one above it, the images are not deleted, their anchors are merely reassigned to the new paragraph.
If you happen to delete a paragraph that has a floating shape anchored to it the alert illustrated in Figure 191 appears, asking:
Are you sure you want to delete the anchored shapes? One or more shapes are anchored to the paragraphs of text that you are about to delete. Deleting those paragraphs will also delete the associated shapes.
You can check the Do not show this message again box if you are secure in your decision.
☞ You can press the Delete key when a floating shape is selected to remove it, without deleting the anchoring paragraph.
Figure 191
Deleting a paragraph with an anchored shape
You can make any inline image into a floating image. When you do this, an entire range of additional tools become available.
Make an inline image into a floating image
1. Click the image to select it.
If the Palette Dock is open, the drawing tools palette group appears.
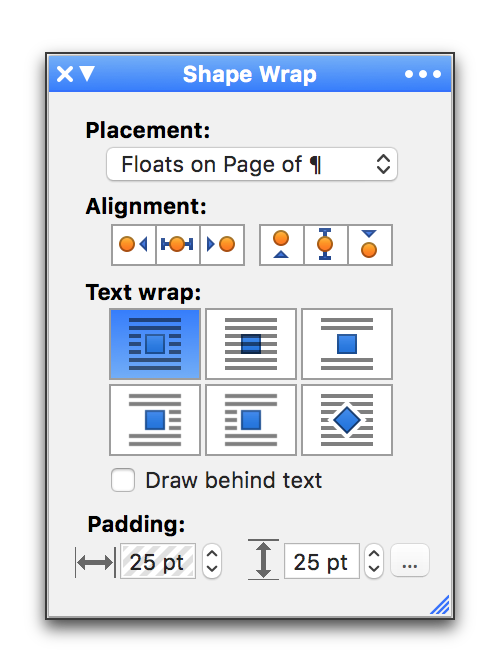
Figure 192
The Shape Wrap palette default options when set to Floats on Page of 
2. Choose either Floats with Paragraph or Floats on page of ¶. from the Placement pop-up menu in the Shape Wrap palette.
Choosing Floats on page of ¶ enables all the options for image alignment and text wrap. However, choosing Floats with Paragraph, because the image retains its vertical position relative to a particular paragraph of text, does not enable the vertical alignment controls.
☞ As an alternative, you can right-click an inline image and a contextual menu appears with a Shape Placement submenu that has the commands: Inline with Text, Floats with Paragraph and Floats on Page of Paragraph. Another command enables you to: Add Caption to Image. Each of these commands (except for Inline with Text) cause the image to float. Adding captions to images is discussed further on page 233. You can also select an inline image and choose the menu command: Tools > Shapes > Shape Placement where the same submenu appears.
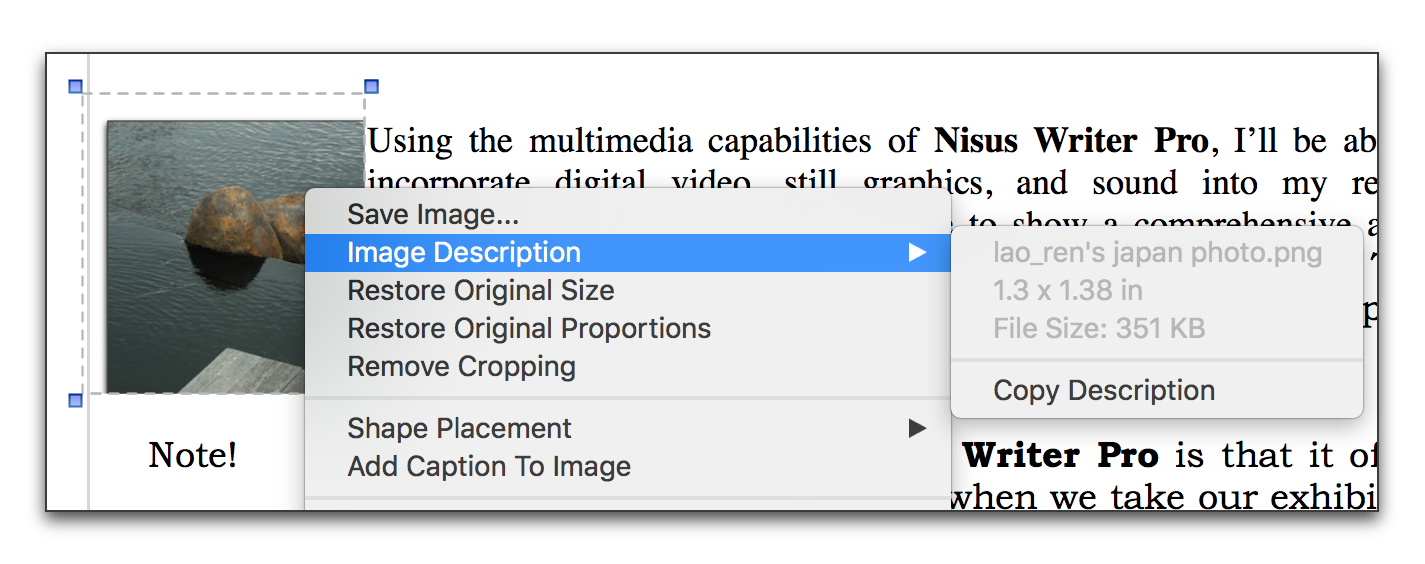
Figure 193
The contextual menu with a resized and cropped inline image selected showing the Image Description submenu
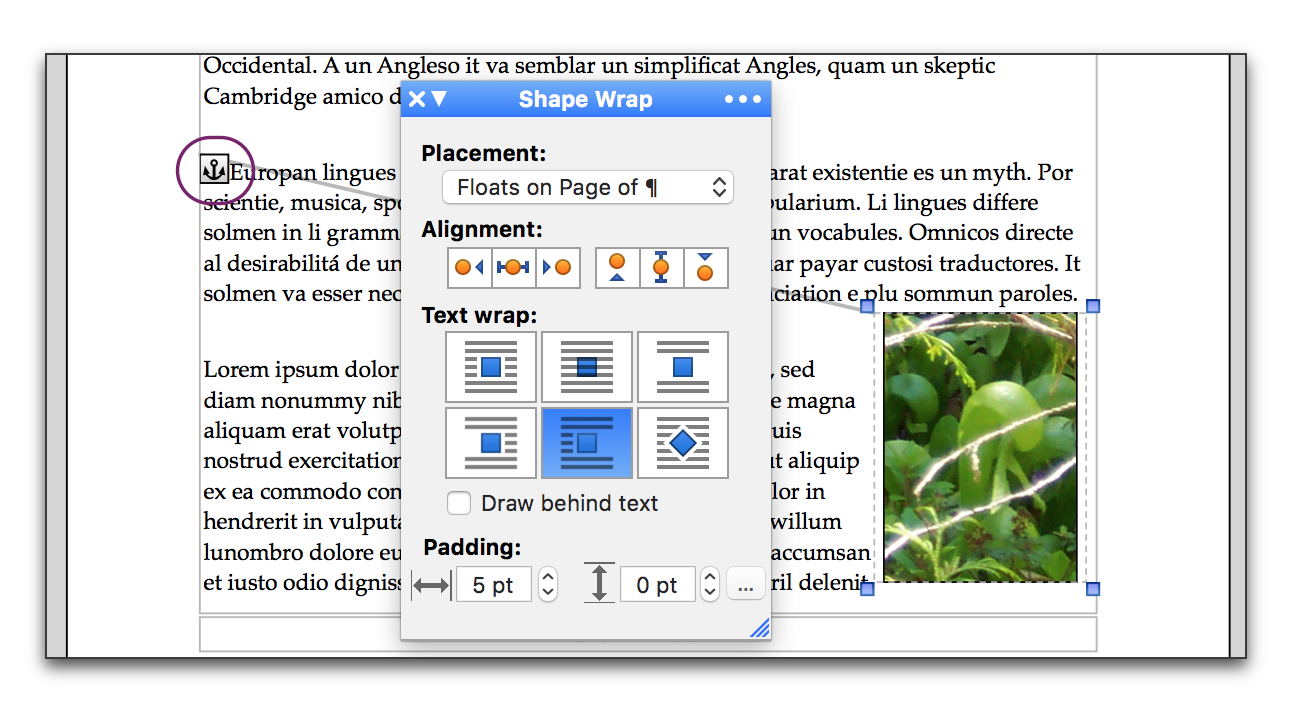
Figure 194
A selected floating image selected showing its anchor
When you select a floating image its “anchor” appears in the upper left corner, overlaying the first character(s) of the paragraph to which it is attached, as illustrated in Figure 194.
If the floating image is attached to a right to left paragraph the anchor appears in a corresponding position in the upper right corner.
If you have checked (turned on) Show Invisibles, a similar anchor, the color of your invisibles, appears. You can see it at the end of the paragraph (before the paragraph symbol ¶) to which the floating image is attached. This anchor indicates that the paragraph has a floating image attached, even if the floating image is not selected and the Shape Anchor does not show. The two different anchor symbols are illustrated in Figure 195.
.png)
.png)
Figure 195
The Shape Anchor: on the left, when the image is selected; to its right, when the image is not selected
• For images/shapes set to move with paragraph, if the anchored paragraph changes its position, the shape moves by the same vertical distance. The shape always keeps the same relative distance from its anchor.
• For images/shapes set to be fixed on the page, the shape always appears on the same page as the anchored paragraph. If the anchored paragraph changes pages, so does the shape.
☞ You can drag the anchor to any other location in the same “document part” thereby moving the image itself. However, you cannot drag the anchor from one document part to another, for example from the main body of the document into the header/footer or footnotes.
You can choose to display the anchor and a dashed line from the anchor to the upper left corner of the image or not, depending on how you set the “Invisibles & Guides” options in the Appearance Preferences. When you select more than one floating shape in your document, only a single selected shape shows its Shape Anchor.
The contextual menus for inline and floating images
As mentioned above, when you right-click an image a contextual menu appears. The menu varies slightly if you have selected an inline or floating image.
The contextual menu for inline images
When you select an inline image the commands that appear are (as mentioned in part above):
This opens the Save As dialog enabling you to save the image with its current extension (you cannot change a “.png” to a “.tiff”) anywhere on your Mac.
Displays a submenu that shows the name of the image, its physical dimensions, and its size on disk as well as a command: Copy Description that enables you to copy that information to the Clipboard.
If you have changed the size or proportion or cropped the image additional commands appear:
If you have resized the image, as explained in the section: “Resize an Image” on page 203, this restores the image to its original size.
• Restore Original Proportions
If you have reshaped the image, this restores the image to its original proportions.
If you have cropped the image, as explained in the section: “Crop an Image” on page 204, this removes the cropping.
Additional commands include:
This opens a submenu with the same commands as in the menu: Tools > Shapes > Shape Placement.
Expands the bounding box of the image enabling you to add text. This text stays with the image as you resize the image and/or copy and paste it elsewhere in the same or another document.
• Additional commands may appear at the bottom of the menu depending on what services and additional software applications you have available.
The contextual menu for floating images
When you select a floating image the commands that appear are:
This opens the Save As dialog enabling you to save the image with its current extension (you cannot change a “.png” to a “.tiff”) anywhere on your Mac.
Displays a submenu that shows the name of the image, its physical dimensions and its size on disk as well as a command: Copy Description that enables you to copy that information to the Clipboard.
If you have changed the size or proportion or cropped the image additional commands appear:
As described in the section “Restore an image’s original size”
• Restore Original Proportions
As described in the section “Restore an image’s original proportions”
As described in the section “Remove cropping”.
Additional commands include:
This opens a submenu with the same commands as in the menu: Tools > Shapes > Shape Placement.
Expands the bounding box of the image enabling you to add text. This text stays with the image as you resize the image and/or copy and paste it elsewhere in the same or another document.
• Send to Back and Bring to Front which alter the sequence of images placing one in front or behind another.
• You can Copy Shape Appearance. This copies the images border stroke, thickness, color, etc., those characteristics that are controlled by the Shape Stroke and Shape Shadow palettes.
• Once you have copied the shape’s appearance, you can apply those characteristics to any other shape you like by choosing Paste Shape Appearance.
• You can also set that shape’s appearance as the default for future shapes you create by choosing Use Selected Shape Appearance As Default.
• If you check (turn on) Adjust Anchor When Shape Repositioned, the shape’s anchor will be automatically moved whenever you move the shape to a different paragraph. This is illustrated and its affects on how you work with your document in “Select floating shapes without selecting text” on page 239.
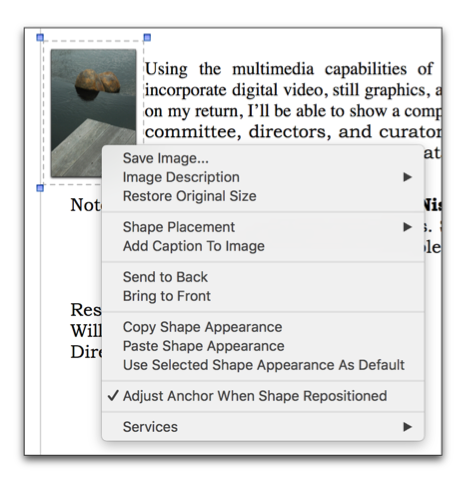
Figure 196
The contextual menu with a resized but not cropped floating image selected
Every shape and image, regardless of whether or not it is a rectangle, has a rectangular “bounding box” that draws around the furthest extent of the graphic’s image. When the image is selected, Nisus Writer Pro displays it as a dotted rectangle. In addition, when not selected, you can choose to display the Shape bounding box (and set its color) depending on how you set your options for “Invisibles & Guides” in the Appearance Preferences. This box coincides perfectly with the “image-selected” box and is the “invisible” indicator that there is an image.
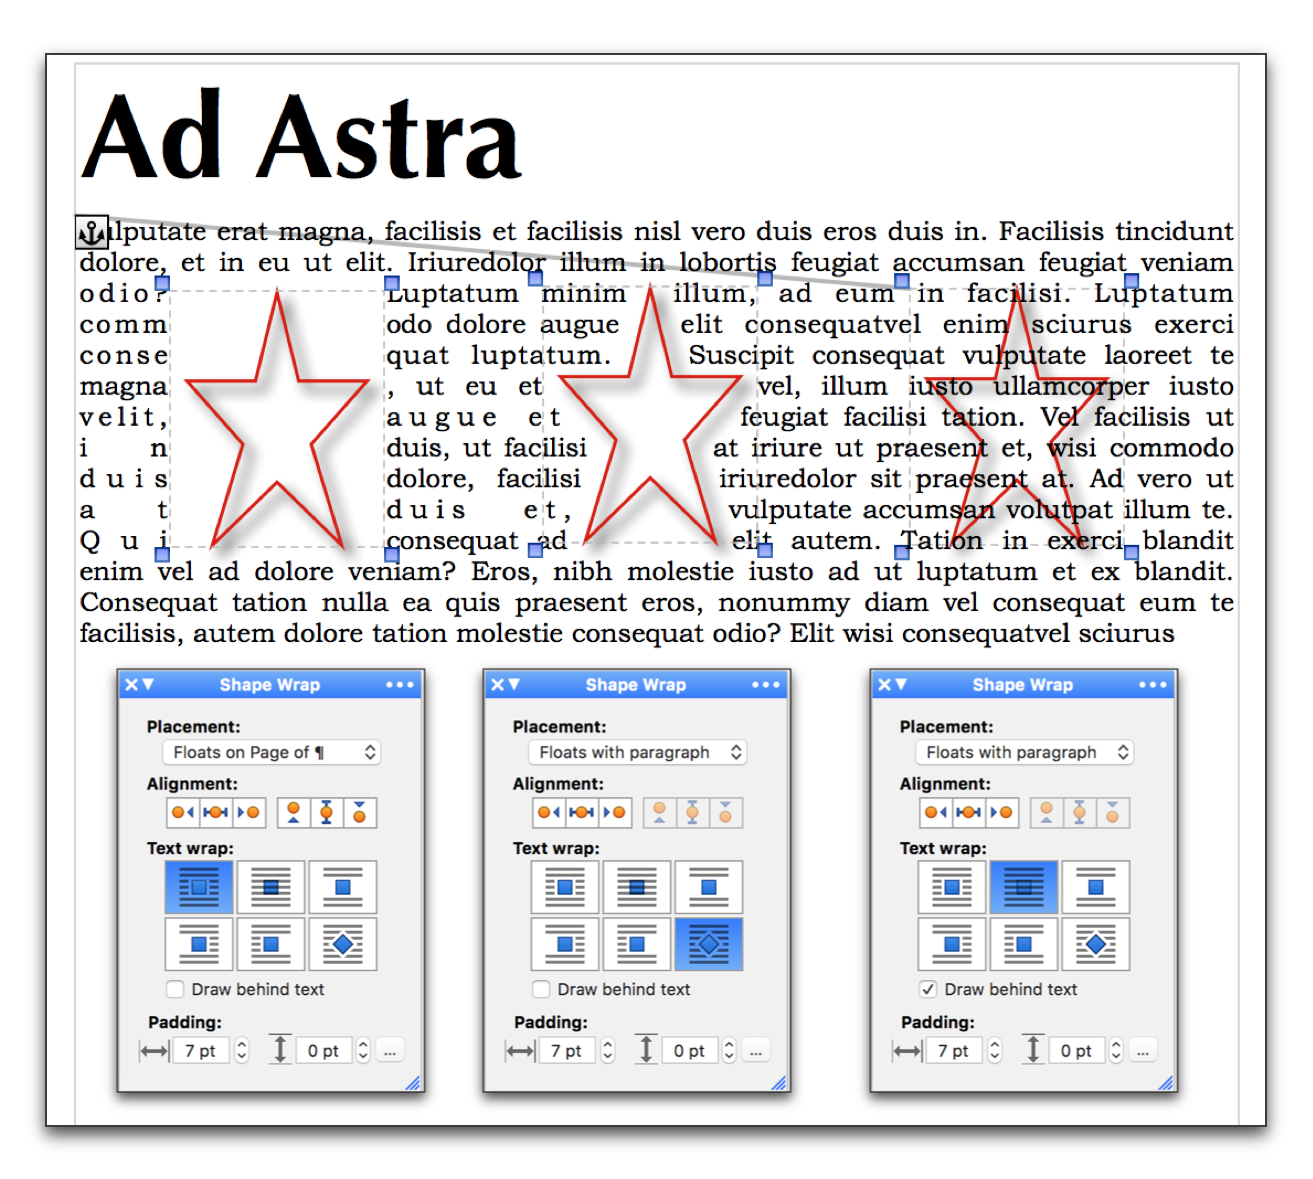
Figure 197
The Shape Bounding Box with shapes selected and text wrapped around the bounding box, wherever it is transparent, then text behind shape
You can nudge a selected floating image one pixel at a time, using the arrow keys on the keyboard, so that it appears where you want it. You can also align floating images horizontally and vertically.
While you can set the basic alignment of an image using the buttons of the Shape Wrap palette, as soon as you adjust the image by nudging it using the arrow keys or drag it using the mouse or trackpad, the Alignment buttons indicate that it is no longer considered “set” as far as the Alignment buttons are concerned.
1. Select the image you want to align.
2. Click the Alignment option that represents what you want from the buttons in the Shape Wrap palette as explained in Table 5 below.
|
Floating Image Alignment Options |
||||
|
Image Alignment |
Horizontal |
|
|
|
|
left |
center |
right |
||
|
Vertical (available only with Position on page of ¶) |
|
|
|
|
|
top |
center |
bottom |
||
Table 5
Floating image alignment options
You can mix the options available so that an image is in the bottom right corner as illustrated in Figure 194 on page 210.
The alignment buttons on the Shape Wrap pallet correspond to the commands Align Left, Align Center, Align Right; Align Top, Align Middle, the menu Tools > Shape Metrics > Align Bottom.
Cause text to wrap around an image
You can have text wrap around a floating image.
1. Select the image around which you want the text to wrap.
2. Click the Text wrap option that represents what you want from the buttons in the Shape Wrap palette as explained in Table 6.
Table 6
Floating image text wrap options
You can mix the alignment and wrap options available so that an image which is in the bottom right corner can have its wrapped text hug the space it holds as illustrated in Figure 194 on page 210.
The floating image text wrap buttons on the Shape Wrap pallet correspond to the commands of the menu: Tools > Shapes > Text Wrapping: Wrap Box, Text Behind Shape (text placement not affected by shape, as illustrated in Figure 201), Shape Behind Text (text placement not affected by shape, as illustrated in Figure 201), No Text on Either Side, No Text on Left Side, No Text on Right Side,
☞ The center star in Figure 197 on page 214 has text wrap set to inside whatever is transparent. Nonetheless, the base of the star and its inside do not have text.
Nisus Writer Pro does not allow placing text inside the shape itself. Text can only flow in from the left or right of the shape bounds, but it can’t “jump” over any part of the shape to appear in the middle of the shape.
• As with all other shapes, a line has a bounding box as explained in “The Shape Bounding Box” on page 213. However, the bounding box does not draw if you set the text to wrap around the actual shape of the image (note the top row, center and left lines) as illustrated in Figure 198. Instead, corner markers indicate where the bounding box would be. The options, described in “Cause text to wrap around an image” on page 215, illustrated here are:
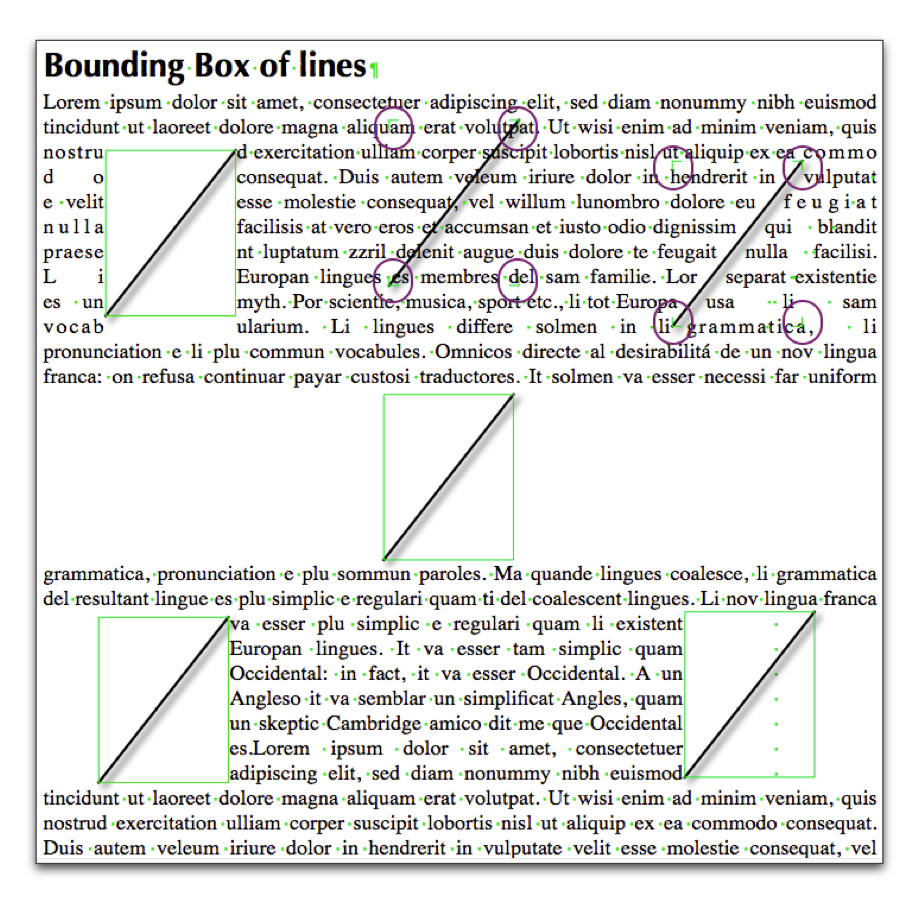
Figure 198
The bounding box drawn around lines with various text wrap options (not selected)
When the shapes are not selected the bounding areas appear as illustrated in Figure 199. However, when you set the text to wrap around the actual shape of the image (note the top row, center and left lines) only the grab handles appear and no bounding box.
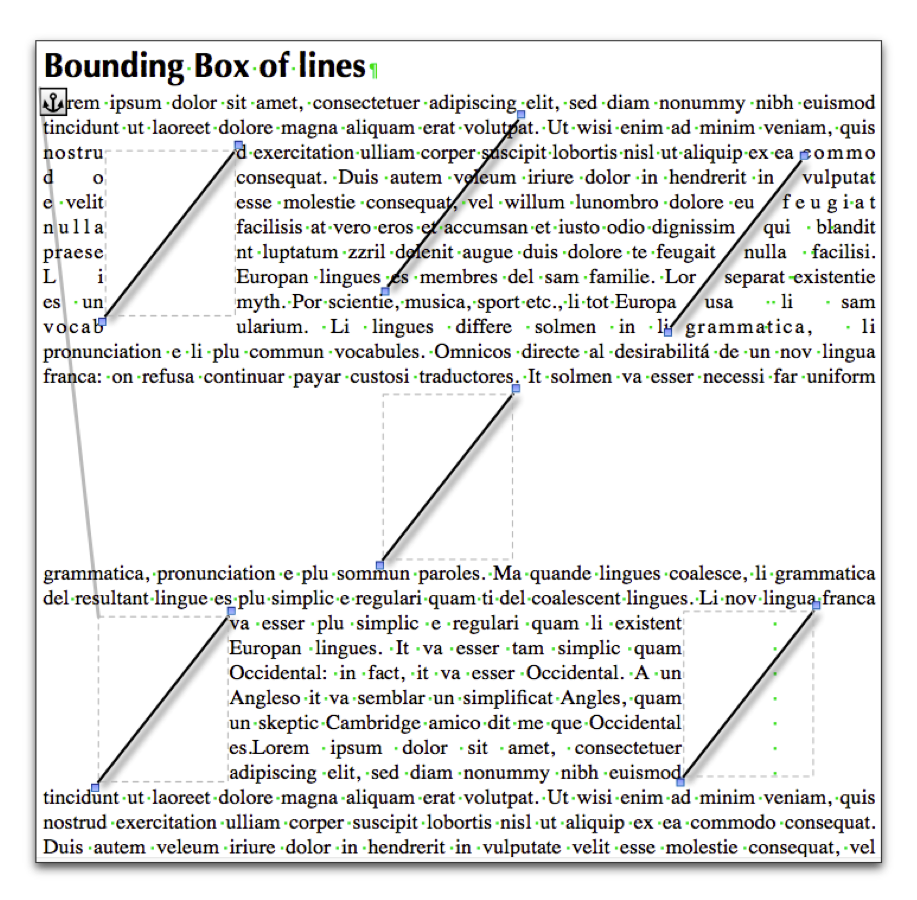
Figure 199
The bounding box drawn around lines with various text wrap options (selected)
◦ First row:
▪︎ Text Wraps Around Bounding Rectangle of the Image, or Wrap Box
▪︎ Text Placement Not Affected by Shape, or Text Behind Shape and Shape Behind Text
▪︎ Text Wraps Around the Actual Shape of the Image “tight”, or Wrap Tight
◦ Second row:
▪︎ Text Never Appears Beside the Image, or No Text on Either Side
◦ Third row:
▪︎ Text Never Appears to Left of the Image, or No Text on Left Side
▪︎ Text Never Appears to Right of the Image, or No Text on Right Side
Set the padding text leaves around an image
If you have text wrap around a floating image you can set both the horizontal and vertical amount of space (padding) that appears between the image and the text. In addition, depending on the text wrap option you use, you can have the padding affect the bounding rectangle, or appear to hug the actual shape of the image as illustrated in Figure 200.
1. In the Padding portion of the Shape Wrap palette, click the steppers (or enter a particular value) in the Horizontal and/or Vertical fields.
☞ You can set these to negative values causing the text to appear on top of the image.
☞ Press ⌘ when you click a palette stepper’s up or down arrow to apply the shown value uniformly to all selected text, instead of adjusting all selected values independently.
2. In the Text wrap portion of the Shape Wrap palette click:
► the upper left button, or choose Wrap Box (text wraps around bounding rectangle of the image) from the menu Tools > Shapes > Text Wrapping.
► the bottom right button, or choose Wrap Tight (text wraps around the actual shape of the image) from the menu Tools > Shapes > Text Wrapping.
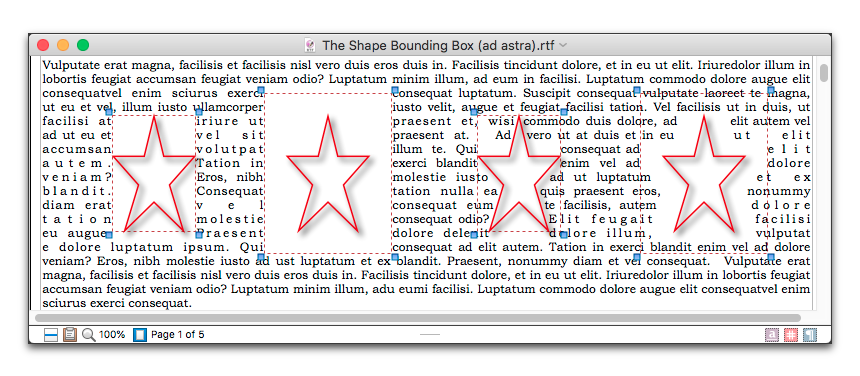
Figure 200
Star shape settings from left to right: box wrap and no padding, box wrap and 22 pts padding, wrap tight and no padding, wrap tight and 22 pts padding
Cause text to appear on top of, or behind an image
If you choose to have the text placement not affected by the floating image, you can have the text display on top of (over) or behind (hidden) by the image.
► Choose the menu command: Tools > Shapes > Text Wrapping > Text Behind Shape to cause the text to hide behind the image.
► Choose the menu command: Tools > Shapes > Text Wrapping > Shape Behind Text to cause the text to appear on top of the image.
Or
► Use the controls of the Shape Wrap palette as illustrated in Figure 201.
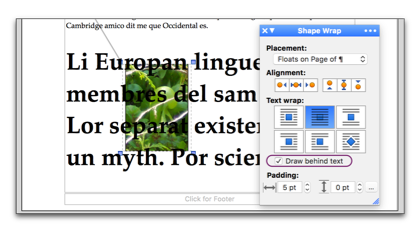
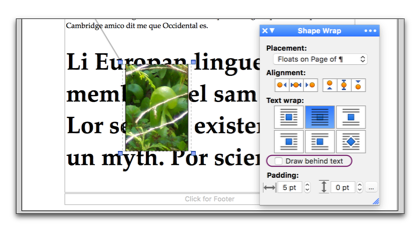
Figure 201
Floating image drawn behind and in front of text
Cause images to appear around text; create a “screen” behind text
Every now and then you may need a bit of text to stand out from the rest. One way is to use a “block-quote” and create a “screen” that appears behind the text.
☞ Nisus Writer Pro has additional tools to create a screen. You can learn more about these in “Use Paragraph Borders and Paragraph Shading to set off your text” on page 435.
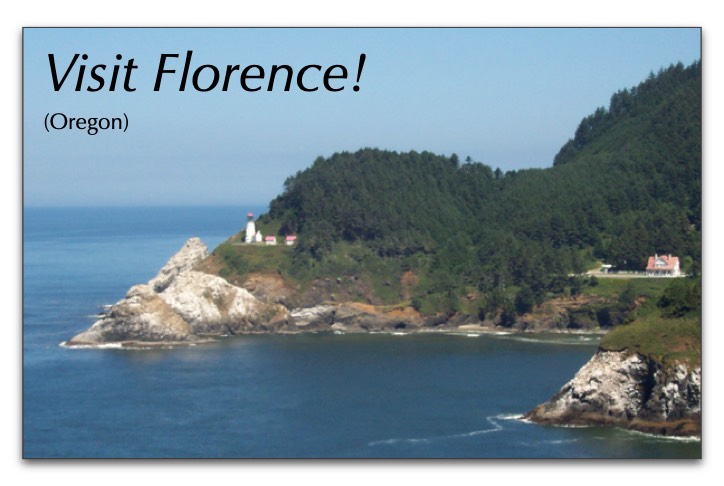
Figure 202
A photographic image “screen” (the blue sky) behind text “Visit Florence!”
[rounded rect]You can place an image behind your text to help portions of it stand out as illustrated in Figure 203.
Every now and then you may need a bit of text to stand out from the rest. One way is to use a “block-quote” and create a “screen” that appears behind the text.
Figure 203
A colored “screen” with a gradient fill and shadow behind text
1. Enter the text with the formatting you want (especially the ruler (line wrap) area).
Make sure you have left room around the text for the image. You may need to have a blank paragraph above the text to which to attach the image.
2. Paste the image into the paragraph above the text.
Use the settings as illustrated in Figure 204 to place the image correctly.
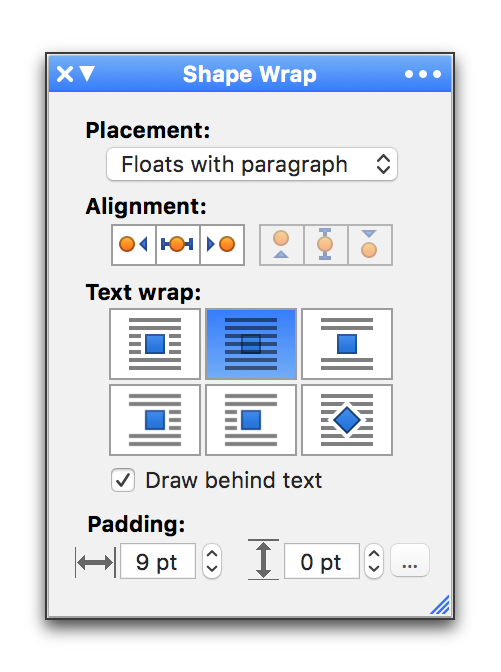
Figure 204
The Shape Wrap palette with settings for a “screen” behind text
3. Choose Floats with Paragraph from the pop-up menu inside the Shape Wrap palette that appears.
4. In the Alignment portion of the Shape Wrap palette click the horizontal center button.
5. In the Text wrap portion of the Shape Wrap palette click the “behind the text” button.
6. Check (turn on) Draw behind text.
7. You may need to select and nudge the image to the precise location you need with the arrow keys.
If you use an image tool that supports LinkBack, as explained on page 643, you can edit the image and not have to worry about pasting in a new one.
As an alternative you can use a Text Box and group it with an image then set the new image to be Inline with Text as illustrated in Figure 202 above. You can learn more about text boxes beginning on page 225.
Another alternative is to use the Paragraph Borders and Paragraph Shading palettes. However, with those you are limited to hard-edged rectangles for the shape of the screen. You can learn more about Paragraph Borders and Paragraph Shading in the section: “Use Paragraph Borders and Paragraph Shading to set off your text” beginning on page 435.
Make a floating image an inline image
Just as an inline image can be made to float, a floating image can be made to flow as a character in your text.
1. Select the floating image or images you want to make inline.
2. Choose:
► Inline with Text from the Placement pop-up menu in the Shape Wrap palette or
► (uncheck) the menu command: Tools > Shapes > Text Wrap Around Shape.
☞ An alert appears illustrated in Figure 205 warning that Placing the selected content inline will change the nature of that content in a way that cannot be restored by again adjusting the placement (though the placement change is undoable in the normal way). All shapes will lose their individual identities, properties, and placements; only a single fixed image will remain. You can choose not to see a similar message if you change other shapes by checking the box at the bottom of the alert.
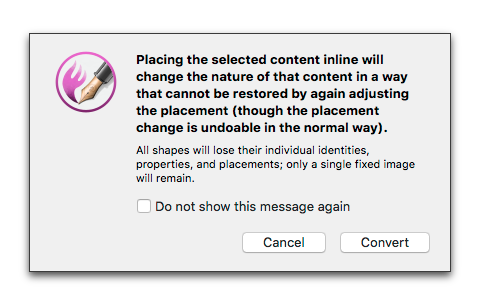
Figure 205
The move shape from floating to inline alert
The images will appear in the paragraphs to which they were anchored as illustrated in Figure 206.
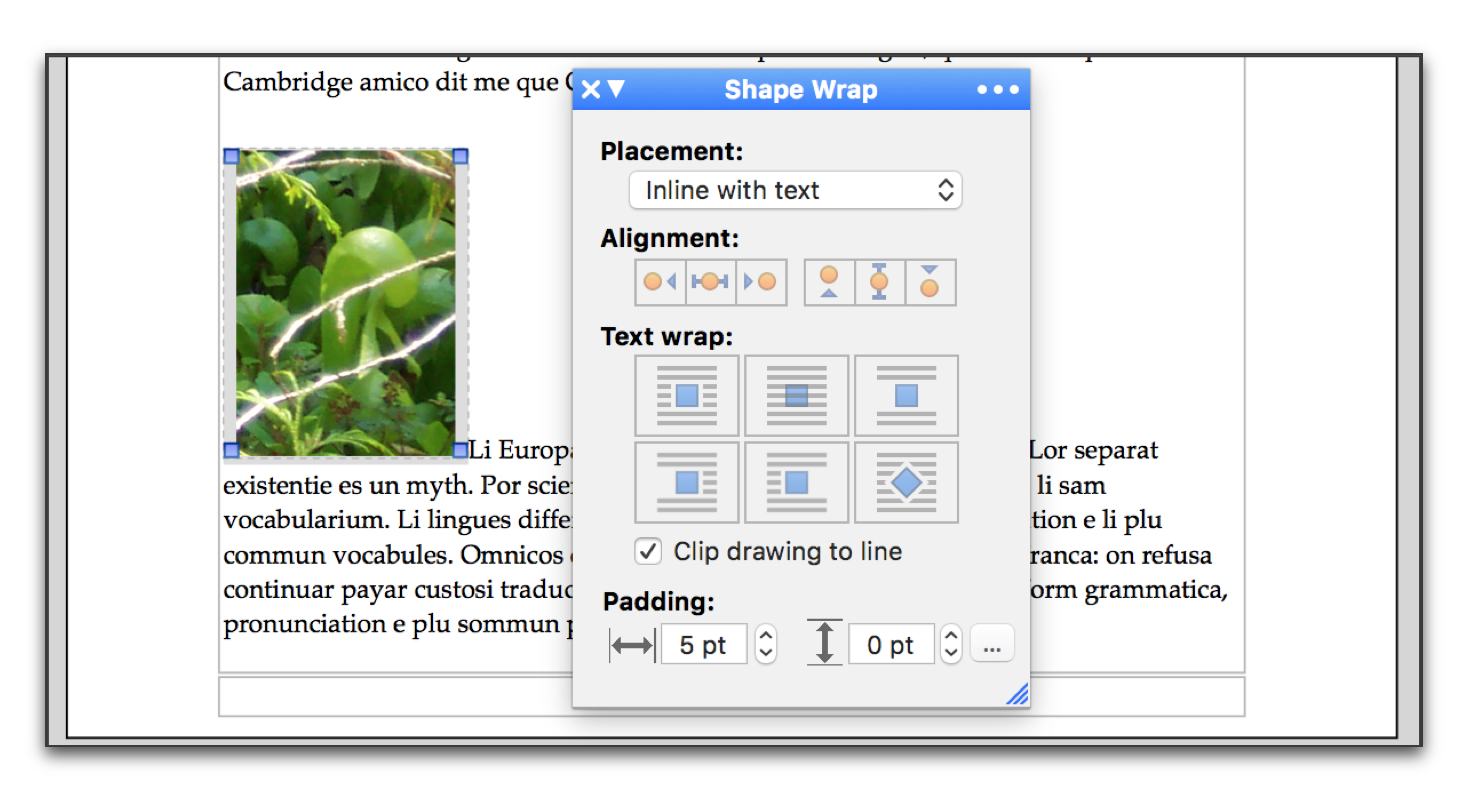
Figure 206
The floating image of Figure 194 on page 210 changed from floating to inline
You may have a document with many images, both inline and floating. Nisus Writer Pro can help you examine them all.
1. Choose the menu File > Image Analysis….
→ The image analysis dialog is displayed (see Figure 207 below).
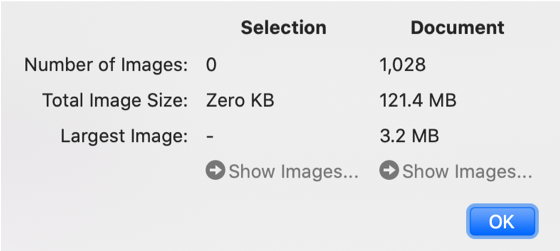
Figure 207 The image analysis dialog
The dialog reports all images in your document, as well as only those within the current text selection. You can see both the number of images, as well as their total size in bytes (required storage space).
ⓘ Only proper images are reported here, like an inserted JPEG or PDF. Shapes that you’ve created using Nisus Writer Pro’s drawing tools, like rectangles or arrows, are not counted. Their impact on your file’s size is negligible.
The image analysis dialog displays the size (in bytes) of the largest image. To see a full list of the largest images, click the Show Images button. A find results window will appear, allowing you to review the largest images in their surrounding context. This is a great tool if you need to reduce your file’s size on disk.
| Previous Chapter Editing Images |
<< index >> |
Next Chapter Work with Shapes |


