A table is a means of presenting a group of related data in a coherent, structured form. Tables are used to
• summarize large amounts of data
• compare data for two or more cases
• group complex data so that relationships are clear
• convey statistics about the underlying data
• list a full matrix of related data.
Tables have a wide variety of uses and, because of the divergent uses, they may take on many different styles as well. There is no “right” or “wrong” way to organize and format a table.
The simplest possible table is one that has at least two entries (and usually has corresponding headers that define the data within the table).
|
|
win |
loss |
|
Tycho |
15 |
1 |
Tables can grow as big as you’d like, although there is a practical limit to their size—usually what will fit onto a single page. Huge tables that sprawl over several pages are extremely difficult to understand at a glance, and the relationships between the data become less distinct when you build, multi-page tables. Nevertheless, you will find that big tables are useful when your ultimate goal is to compile an organized reference to a large, underlying database.
☞ One important distinction to make in creating a table is whether or not the table is a summary of information in an unseen database, or an exhaustive listing of the entire data in the database. The former tends to result in small, concise tables that tell a story or highlight a particular point or statistic. The latter are often long, multi-page tables that are only consulted as references. Nisus Writer Pro’s table capability can handle both.
|
When To Use Tables |
||||
|
Tables should be used when: |
The information is not suitable for graphing |
The actual data values are more important than a graphical summary. |
The information can clearly be broken into related parts and groups. |
It is important to see the relationship between to or more pieces of data. |
|
Tables should not be used if: |
The data clearly lends itself to a visual representation (graphs, for example). |
The data cannot be organized into meaningful groups. |
The data contains extensive text that must be read rather than scanned. |
|
You can paste a table into the “Replace with” field of the Find & Replace window to replace all found objects with a table. This enables you to add a placeholder for a table in your document and then at a later time replace those placeholders with a specified table that you can edit at will.
1. Put your insertion point where you want the table to appear.
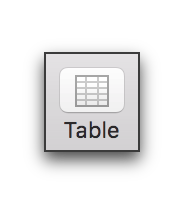
2. Either click the Table button on the Toolbar
Figure 241
The Insert Table button
► Or, Choose the menu command: Table > New Table….
When you insert a table Nisus Writer Pro creates a new style in your document (if one does not already exist in your Nisus New File) called Table Cell. If the table you insert has either a column header and/or a row header, Nisus Writer Pro creates a style called Table Header. The Table Cell style is based on the Normal style in your document and the Table Header style is based on the Table Cell style. You can modify these styles using the Style Sheet view of your document.
Determine the size (number of rows/columns) of a table
When you choose New Table… from the menus Nisus Writer Pro presents a sheet in which you determine how many rows and columns your table will have. You can increase and/or decrease the number whenever you need.

Figure 242
The Insert Table sheet
1. Choose the menu command: Table > New Table….
2. Click to choose the type of table you want from the options at the top of the dialog:
◦ no headers
◦ row and column headers
◦ row headers only.
3. Type the number of columns you want, or, use the “stepper” to the right of the number of Columns field to increase or decrease the number.
☞ Press ⌘ when you click a palette stepper’s up or down arrow to apply the shown value uniformly to all selected text, instead of adjusting all selected values independently.
4. When you are satisfied with the number of columns you want press ⇥ or click in the number of Rows field.
5. Type the number of rows you want, or, use the “stepper” to the right of the number of Rows field to increase or decrease the number.
6. When you are satisfied with the number of columns and rows you want press ⏎ or click Insert to confirm your choice and display the table in the document.
Or
1. Click the Insert Table button on the Toolbar.
2. Drag your pointer in the Style area to choose the type of table you want
◦ no headers
◦ row and column headers
◦ row headers only
3. Continue to drag your pointer in the Size area to increase or decrease the number of columns and rows.
Your pointer (in a left to right environment) indicates the lowest right cell of the table.
4. When you are satisfied with the size (and shape) of the table, release your mouse button or trackpad.
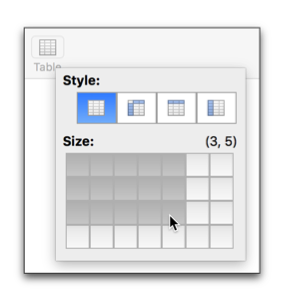
Figure 243
Creating a table from the Insert Table button
☞ In right to left documents or sections of documents, the primary tools relevant to tables appear for right to left editing.
Figure 244
A right to left table
You can add or subtract rows and/or columns at any time once you have inserted the table as explained on page 272.
► Click your insertion point in the appropriate field and type or paste your text or image.
► Press ⌥ ⇥ to enter a tab character into any cell (otherwise, pressing ⇥ moves your insertion point to the next cell).
Create a table with pre-existing text
You can create a table with two kinds of pre-existing “tab-delimited” text that may be on your Clipboard (copied from another application), or text that may be in your document.
1. Click where you want the table to appear and choose the menu command: Edit > Paste.
2. Select the text you want to have appear in table form and choose the menu command: Table > Convert to Table.
► Click your insertion point in the field in which you wish to have your image appear and paste your image.
Many images can appear in one cell.
|
|
Table Palette Buttons |
||
|
Table Alignment |
|
|
|
|
left |
center |
right |
|
Navigate among the cells of a table
When you edit text inside a table cell, you can use the keyboard to move your insertion point
• The ← and → keys move the insertion point into the cells on the left and right respectively.
• The ↑ and ↓ arrow keys move the insertion point into the cells above and below respectively
• Press ⇥ to move the insertion point into the next cell.
☞ If you are in the last cell of a table pressing ⇥ inserts a new row.
• Press ⇧ ⇥ to move the insertion point to the preceding cell.
Select cells, or portions of… or the entire table
You can select portions of your table using the mouse or trackpad or the keyboard.
► Click your insertion point inside any cell and drag to select additional cells.
► Click your insertion point inside any cell and choose the menu command: Table > Select > Cells.
☞ If you have a multipart selection in more than one cell, this selects all cells in which you have selections. (To create a multipart text selection press ⌘ as you select additional text.)
► Click your insertion point inside any cell and choose the menu command: Table > Select > Columns.
This selects all cells contiguous with the one in which your insertion point appears, even if they are merged with other columns.
► Click your insertion point inside any cell and choose the menu command: Table > Select > Rows.
This selects all cells contiguous with the one in which your insertion point appears, even if they are merged with other rows.
► Click your insertion point inside any cell and choose the menu command: Table > Select > Table.
This selects all the cells of the table.
► Click your insertion point inside any cell and press ⌘a (lowercase “a”).
This selects the entire contents of the cell.
► Click your insertion point inside any cell and press ⇧ followed by any arrow key. When all text in any particular direction has been selected Nisus Writer Pro selects the entire cell (not just the text).
► Click your insertion point inside any cell and press ⇧⌘a.
This selects all cells in the column contiguous with the one in which your insertion point appears, even if they are merged with other columns.
► Click your insertion point inside any cell and press ⌥⌘a.
This selects all cells in the row contiguous with the one in which your insertion point appears, even if they are merged with other rows.
► Click your insertion point inside any cell and press ⌘a to select all text in the cell of the insertion point, then, again ⌘a.
This selects all the cells of the table.
Determine the alignment (position) of a table on the page
Tables align independently of the text of your document.
► Click the alignment you wish to have using the appropriate button in the Table palette.
► Choose the appropriate alignment (Align Left, Center or Align Right) from the Table menu.
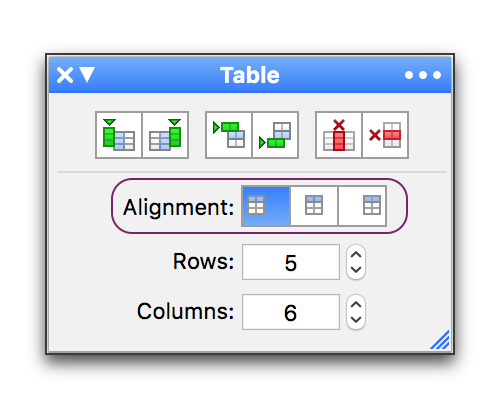
Figure 245
The Table palette indicating the table alignment options with left selected and center and right beside it
Determine the alignment (position) of text in a table
Text and images in the cells of a table can be aligned both horizontally and vertically. If a cell has multiple paragraphs, each paragraph in the cell can have its own alignment.
|
|
Table Cells Palette Buttons |
||||
|
Text Alignment |
Horizontal |
|
|
|
|
|
aligned |
center |
aligned |
text fully justified |
||
|
Vertical |
|
|
|
|
|
|
top |
middle |
bottom |
|
||
Table 12
The table cell alignment buttons
1. Determine which cell or cells you wish to alter:
► click your insertion point in the cell
► drag across the cells
► create a multipart text selection
2. Click the appropriate alignment button in the Table Cells palette.
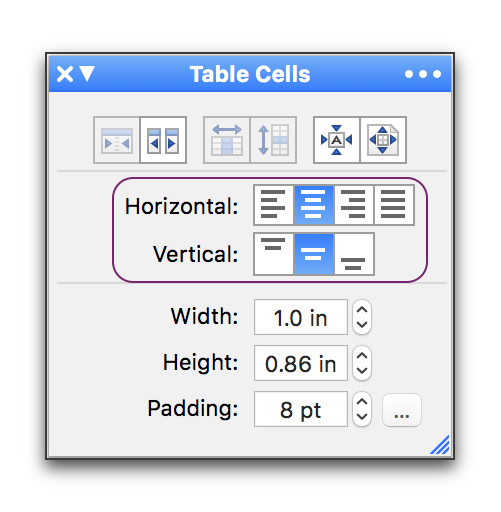
Figure 246
The text alignment buttons of the Table Cells palette
Or
► Choose Align Left, Align Right, Center, or Justified for horizontal alignment or Top, Bottom, or Middle for vertical alignment.
Align text in table cells along the decimal point
Numbers often need to be aligned along a decimal point.
☞ You would probably want to follow this procedure with Invisibles turned on (choose the menu command: View > Show Invisibles).
1. Create your table.
2. Click your insertion point in the top cell of the column to be aligned by the decimal point.
3. Make sure the Ruler displays and choose the menu command: Tab > Decimal.
4. Click on the ruler at the location you want the tab to appear (you can always adjust this later if you need).
5. Press ⌥ ⇥ to enter a tab character into the cell where you have set the tab.
6. Select the contents of that cell (the tab character).
7. Select the other cells that you want to have share that decimal tab formatting.
This can be either a single cell or multiple columns or rows of cells.
8. Choose Align Left or Justified from the menu Table > Align Cells, or click the appropriate button on the Table Cells palette.
9. Choose the menu command: Edit > Paste.
10. Enter the text you want in each cell being sure to add the text following the tab character.
Figure 247 below, is a composite to show multiple insertion points on the ruler. It illustrates columns of numbers with decimal points aligned by decimal point (from left to right), left, center, right and justified. The decimal point is highlighted in each column.
☞ Aligning the cells either by center or right can cause poor alignment.
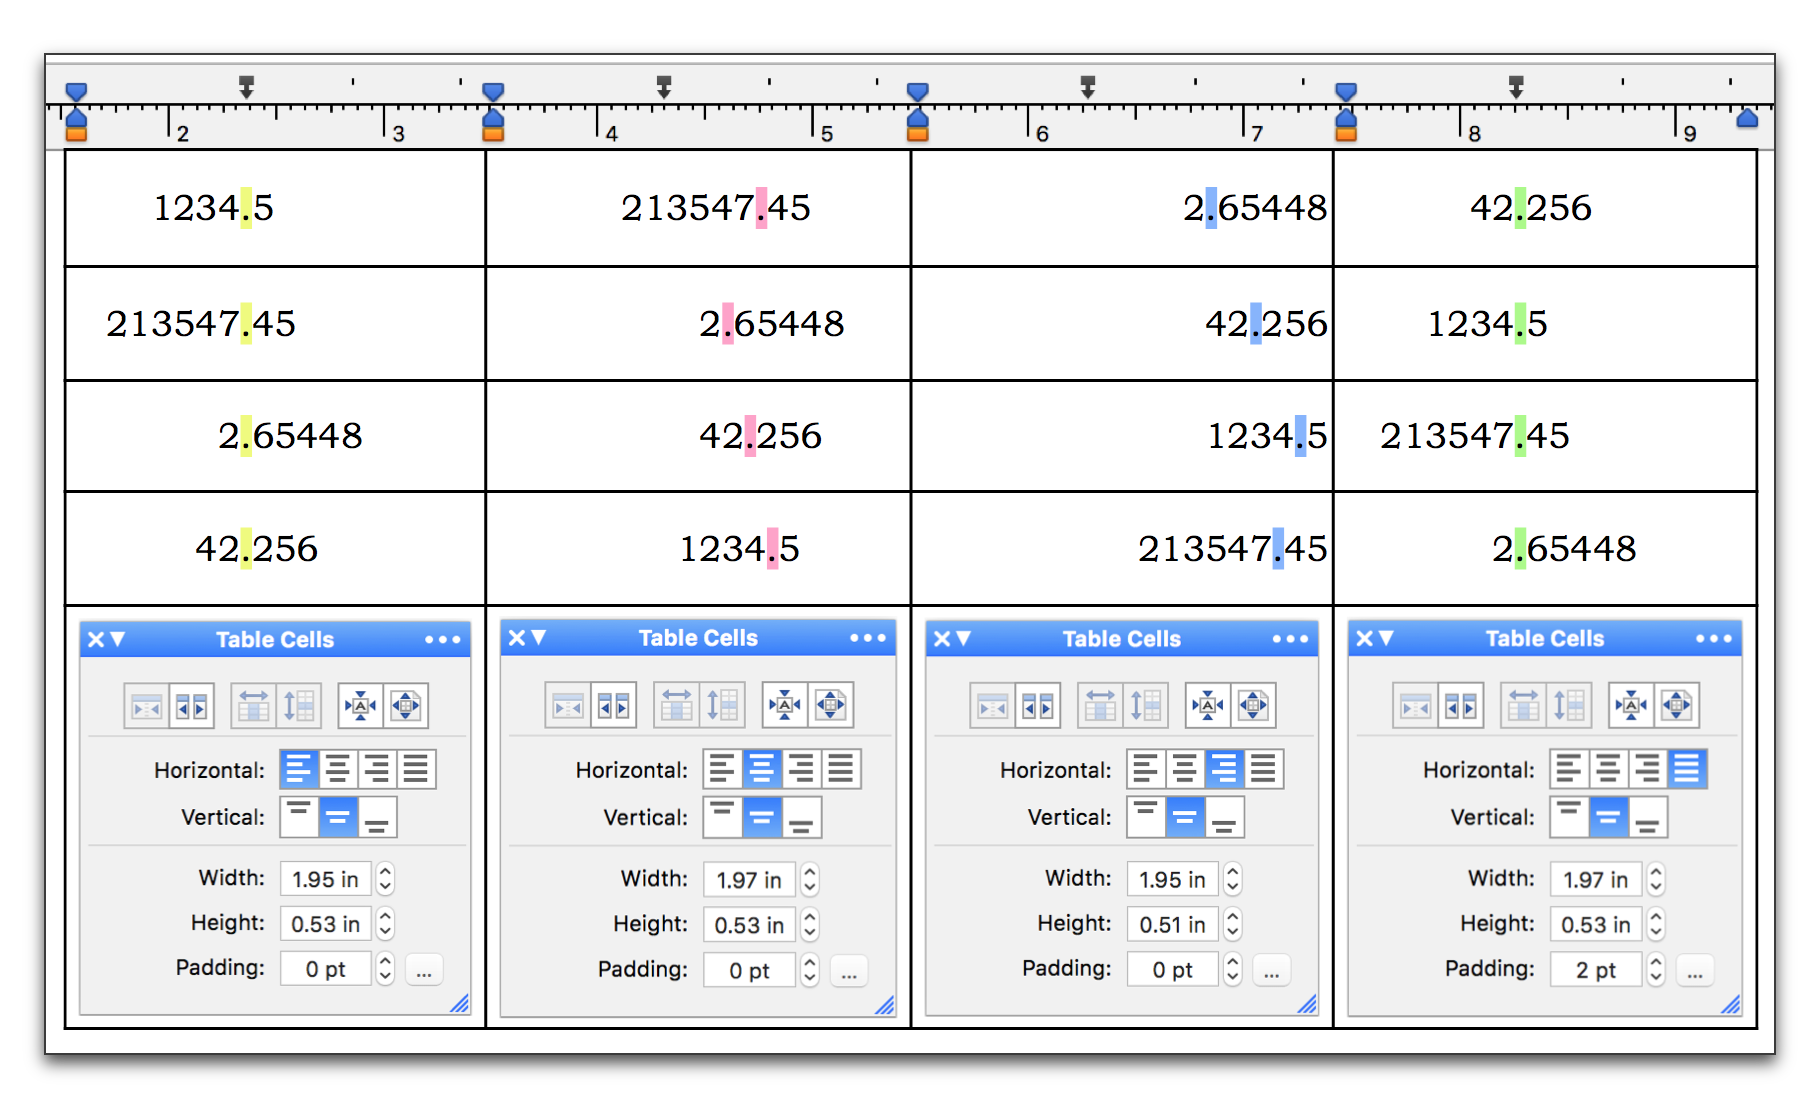
Figure 247
Text aligned by decimal points (color coded) in a table
If, as you work on your table, you determine that you need additional cells, either as rows or columns, you can add them at any time.
► Click your insertion point in the cell beside which you want to add cells and click the appropriate button in the Table palette.
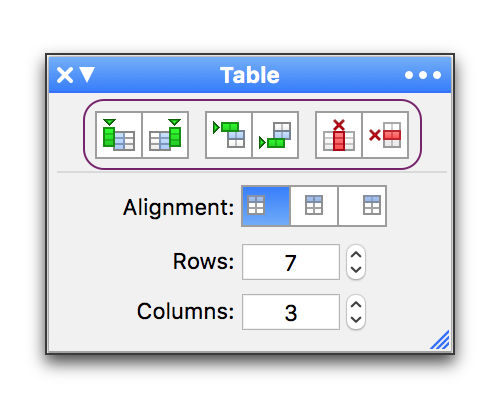
Figure 248
The insert and delete buttons of the Table palette
Or
► Click your insertion point in the cell beside which you want to add cells and choose Column to the Left, Column to the Right, Row Above, or Row Below, from the menu Table > Insert.
|
|
Table Palette Buttons |
|
|
Insert Column |
|
|
|
to the left |
to the right |
|
|
Insert Row |
|
|
|
above |
below |
|
|
Delete |
|
|
|
column |
row |
|
Table 13
The insert and delete buttons
► Click your insertion point in the row or column (or select the rows or columns or cells) you wish to remove and click the appropriate button in the Table palette.
Or
► Click your insertion point in the row or column (or select the rows or columns or cells) you wish to remove and choose Rows, Columns, or Cells from the menu Table > Delete.
You can sort the rows of a table either in ascending or descending order. You can reverse the sequence or randomize it.
1. Click your insertion point in any cell of the column by which you wish to sort.
2. Choose either Sort By Selected Column Ascending (A-Z) or Sort By Selected Column Descending (Z-A), depending on the sequence you want.
Ascending sorting based on selected cells is illustrated in Table 14 through Table 16.
|
Name |
Anne |
Betty |
Cathy |
Doris |
Evelyn |
Faye |
Gladys |
|
Hair Color |
Black |
Blond |
Blond |
Brown |
Brown |
Red |
Red |
|
Where Living Now |
England |
Germany |
France |
Andorra |
Italy |
Israel |
Latvia |
|
City Of Birth |
Atlanta |
Annapolis |
Bismarck |
Albany |
Augusta |
Baton Rouge |
Austin |
|
Went To School In |
Alaska |
Delaware |
Georgia |
Florida |
California |
Arkansas |
Colorado |
|
Eye Color |
Blue |
Blue |
Brown |
Brown |
Green |
Hazel |
Hazel |
|
Name |
Anne |
Betty |
Cathy |
Doris |
Evelyn |
Faye |
Gladys |
|
Hair Color |
Black |
Blond |
Blond |
Brown |
Brown |
Red |
Red |
|
City Of Birth |
Atlanta |
Annapolis |
Bismarck |
Albany |
Augusta |
Baton Rouge |
Austin |
|
Went To School In |
Alaska |
Delaware |
Georgia |
Florida |
California |
Arkansas |
Colorado |
|
Eye Color |
Blue |
Blue |
Brown |
Brown |
Green |
Hazel |
Hazel |
|
Where Living Now |
England |
Germany |
France |
Andorra |
Italy |
Israel |
Latvia |
Table 15
Original table after selecting the four vertical cells beginning with Italy (light brown, or “Evelyn” column); note the sequence in the Row Headers
|
Name |
Anne |
Betty |
Cathy |
Doris |
Evelyn |
Faye |
Gladys |
|
Hair Color |
Black |
Blond |
Blond |
Brown |
Brown |
Red |
Red |
|
City Of Birth |
Atlanta |
Annapolis |
Bismarck |
Albany |
Augusta |
Baton Rouge |
Austin |
|
Eye Color |
Blue |
Blue |
Brown |
Brown |
Green |
Hazel |
Hazel |
|
Where Living Now |
England |
Germany |
France |
Andorra |
Italy |
Israel |
Latvia |
|
Went To School In |
Alaska |
Delaware |
Georgia |
Florida |
California |
Arkansas |
Colorado |
Table 16
Original table after selecting the four cells beginning with France (pink, or “Cathy” column); note the sequence in the Row Headers
You can merge multiple, contiguous, cells into one.
► Select the cells you wish to merge and click the Merge Cells button in the Table Cells palette.
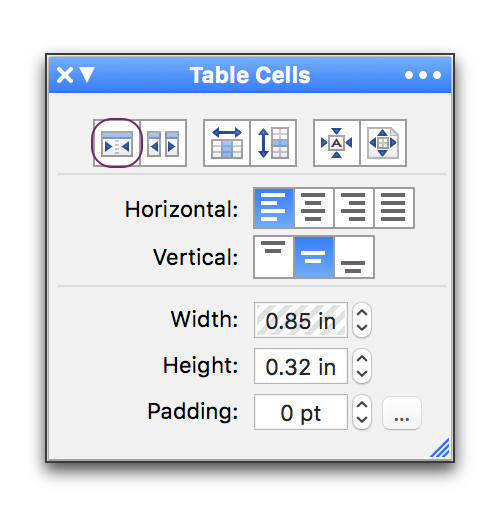
Figure 249
The Merge Cells button on the Table Cells palette
Or
► Select the cells you wish to merge and choose the menu command: Table > Merge Cells.
☞ The illustrations that follow may not represent anything you would want to do, but, they are here to indicate simply what does happen.
The text here is from The Frozen Logger by James Stevens (long out of copyright)
<https://en.wikipedia.org/wiki/Frozen_Logger>
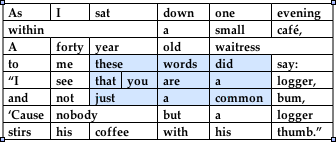
Figure 250
Cells selected to merge
☞ Note that when you merge cells Nisus Writer Pro does not maintain the normal flow of the text. Be careful what you ask for.
Merging cells merges all selected cells into one, splitting cells offers a variety of options.
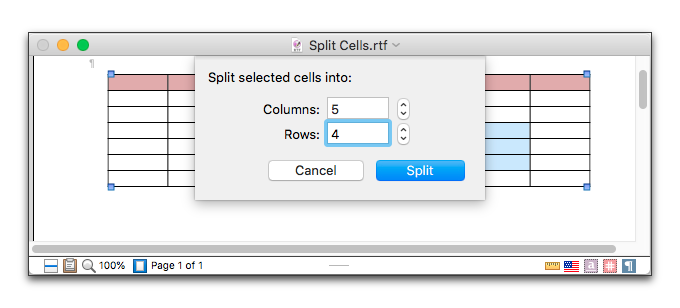
Figure 252
The split cells sheet
► Put your insertion point inside the cell you wish to split (or select the cells (rows or columns) you wish to split) and click the Split Cells button on the Table Cells palette.
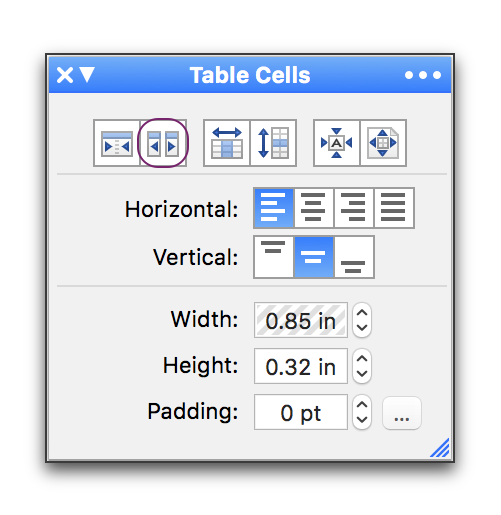
Figure 253
The Split Cells button on the Table Cells palette
Or
► Put your insertion point inside the cell you wish to split (or select the cells (rows or columns) you wish to split) and choose the menu command: Table > Split Cells….
You can make a table smaller than is useful:
|
a |
Figure 254
A tiny one-celled table with a 3 point letter “a” inside
Or make a table span multiple pages.
The tiny “one-celled” table in the sentence in Figure 254 cannot be used for anything. You can resize any cell in a Nisus Writer Pro table.
1. Place the pointer over the line you want to adjust. Your pointer will change from an I-beam to a line with arrows pointing in opposite directions.
2. Click and drag the line down to make the cell larger, or, up to make it smaller.
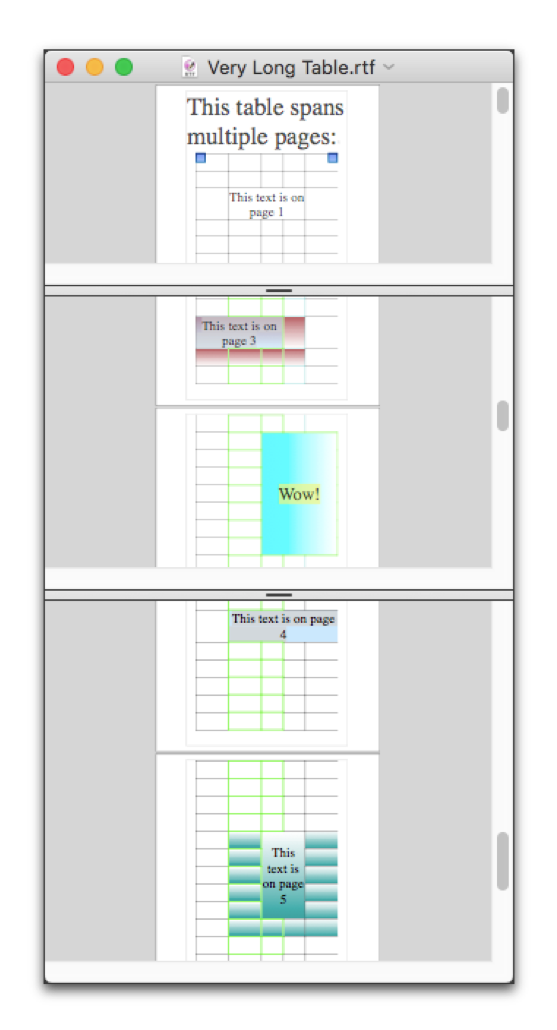
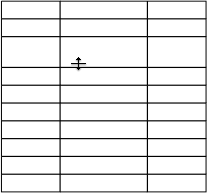
Figure 256
Expanding the height of a cell in a table
☞ The way in which you align your table determines the way in which cells expand and contract horizontally.
• The cells of left aligned tables expand to the right.
• The cells of right aligned tables expand to the left.
• The cells of center aligned tables expand from the center out.
You can resize your tables’ cells numerically as illustrated in Figure 257.
1. Open the Table Cells palette.
2. Select the cell(s) you want to modify.
3. Either…
▷ enter the value you want in the Width and/or Height fields, or
▷ click the palette’s stepper’s up or down arrows to adjust the width and/or height.
☞ Press ⌘ when you click a palette stepper’s up or down arrow to apply the shown value uniformly to all selected text, instead of adjusting all selected values independently.
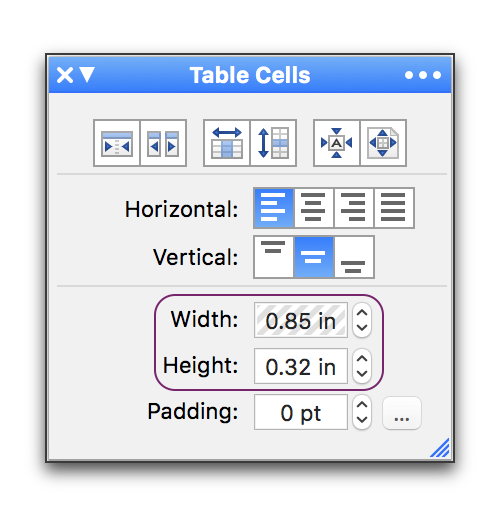
Figure 257
The Width and Height fields of the Table Cells palette
You may have a variety of cells of varying widths, to equalize them:
1. Select the cells you wish to equalize.
2. Click the Balance Cell Widths button on the Table Cells palette or choose the menu command: Table > Distribute Columns Evenly.
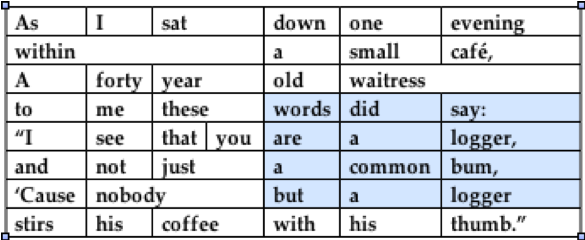
Figure 258
A table with unequal cell widths before “equalizing”
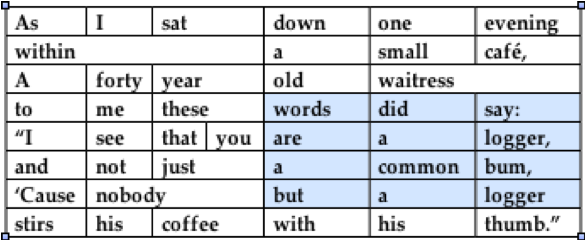
Figure 259
A table with cell widths equalized (notice the words “words” and “common”)
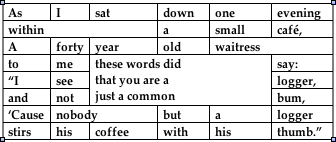
Equalized, or balanced, means precisely that. If you select cells in which one of the words extends the width of the cell and then balance the cells, the text in the wider cell will wrap.
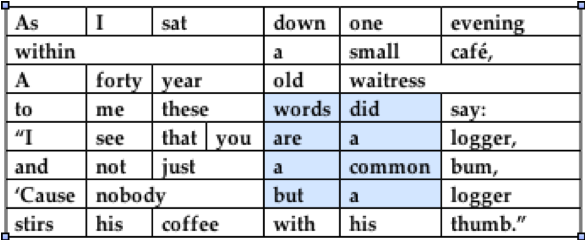
Figure 260
A table with a wide cell due to a longer word (notice the words “common” and “but”)
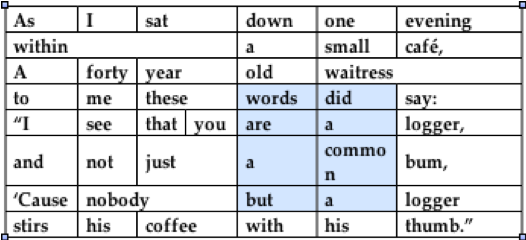
Figure 261
The same table with cell widths equalized (notice the word “common”)
☞ To Equalize cells in which you have text that should not wrap (as in the illustrations Figure 260 and Figure 261 above), use the Fit to Contents tool as explained in “Cause the table to resize to fit its contents (and settings)” on page 283.
You may have done something to cause the height of a variety of rows to differ. You can equalize them.
|
As |
I |
sat |
down |
one |
evening |
|
|
within |
a |
small |
café, |
|||
|
A |
forty |
year |
old |
waitress |
||
|
to |
me |
these |
words |
did |
say: |
|
|
I |
see |
that |
you |
are |
a |
logger, |
|
and |
not |
just |
a |
common |
bum, |
|
|
’Cause |
nobody |
but |
a |
logger |
||
|
stirs |
his |
coffee |
with |
his |
thumb.” |
|
Table 17
The table of Figure 261 above with pronouns made larger (taller)
1. Select the cells you wish to equalize.
2. Click the Balance Cell Heights button on the Table Cells palette or choose the menu command: Table > Distribute Rows Evenly.
|
As |
I |
sat |
down |
one |
evening |
|
|
within |
a |
small |
café, |
|||
|
A |
forty |
year |
old |
waitress |
||
|
to |
me |
these |
words |
did |
say: |
|
|
I |
see |
that |
you |
are |
a |
logger, |
|
and |
not |
just |
a |
common |
bum, |
|
|
’Cause |
nobody |
but |
a |
logger |
||
|
stirs |
his |
coffee |
with |
his |
thumb.” |
|
Table 18
Table 17 above with cells heights distributed evenly
Cause the table to resize to fit its contents (and settings)
You can resize any column to have its contents fit the cells by dragging the appropriate line.
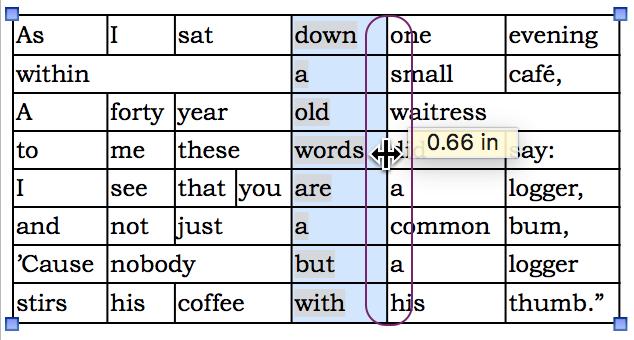
Figure 262
Dragging a line to cause the cell to fit the contents
However, to cause the entire table to “hug” its contents (based on the size (amount) of the text and its padding (as explained on page 286), Nisus Writer Pro offers a special tool.
1. Click anywhere in the table to activate it.
2. Click the Fit to Contents button on the Table Cells palette or choose the menu command: Table > Fit to Contents.
|
As |
I |
sat |
down |
one |
evening |
|
|
within |
|
|
a |
small |
café, |
|
|
A |
forty |
year |
old |
waitress |
|
|
|
to |
me |
these |
words |
did |
say: |
|
|
I |
see |
that |
you |
are |
a |
logger, |
|
and |
not |
just |
|
a |
common |
bum, |
|
’Cause |
nobody |
|
|
but |
a |
logger |
|
stirs |
his |
coffee |
|
with |
his |
thumb.” |
Table 19
Result of choosing Fit to Contents
This command affects the height of rows as well as their width.
Cause the table to resize to fit the full extent of the page
You can cause the table and its contents to resize to fit the width of the page.
1. Click anywhere in the table to activate it.
2. Click the Fit to Page button on the Table Cells palette or choose the menu command: Table > Fit to Page.
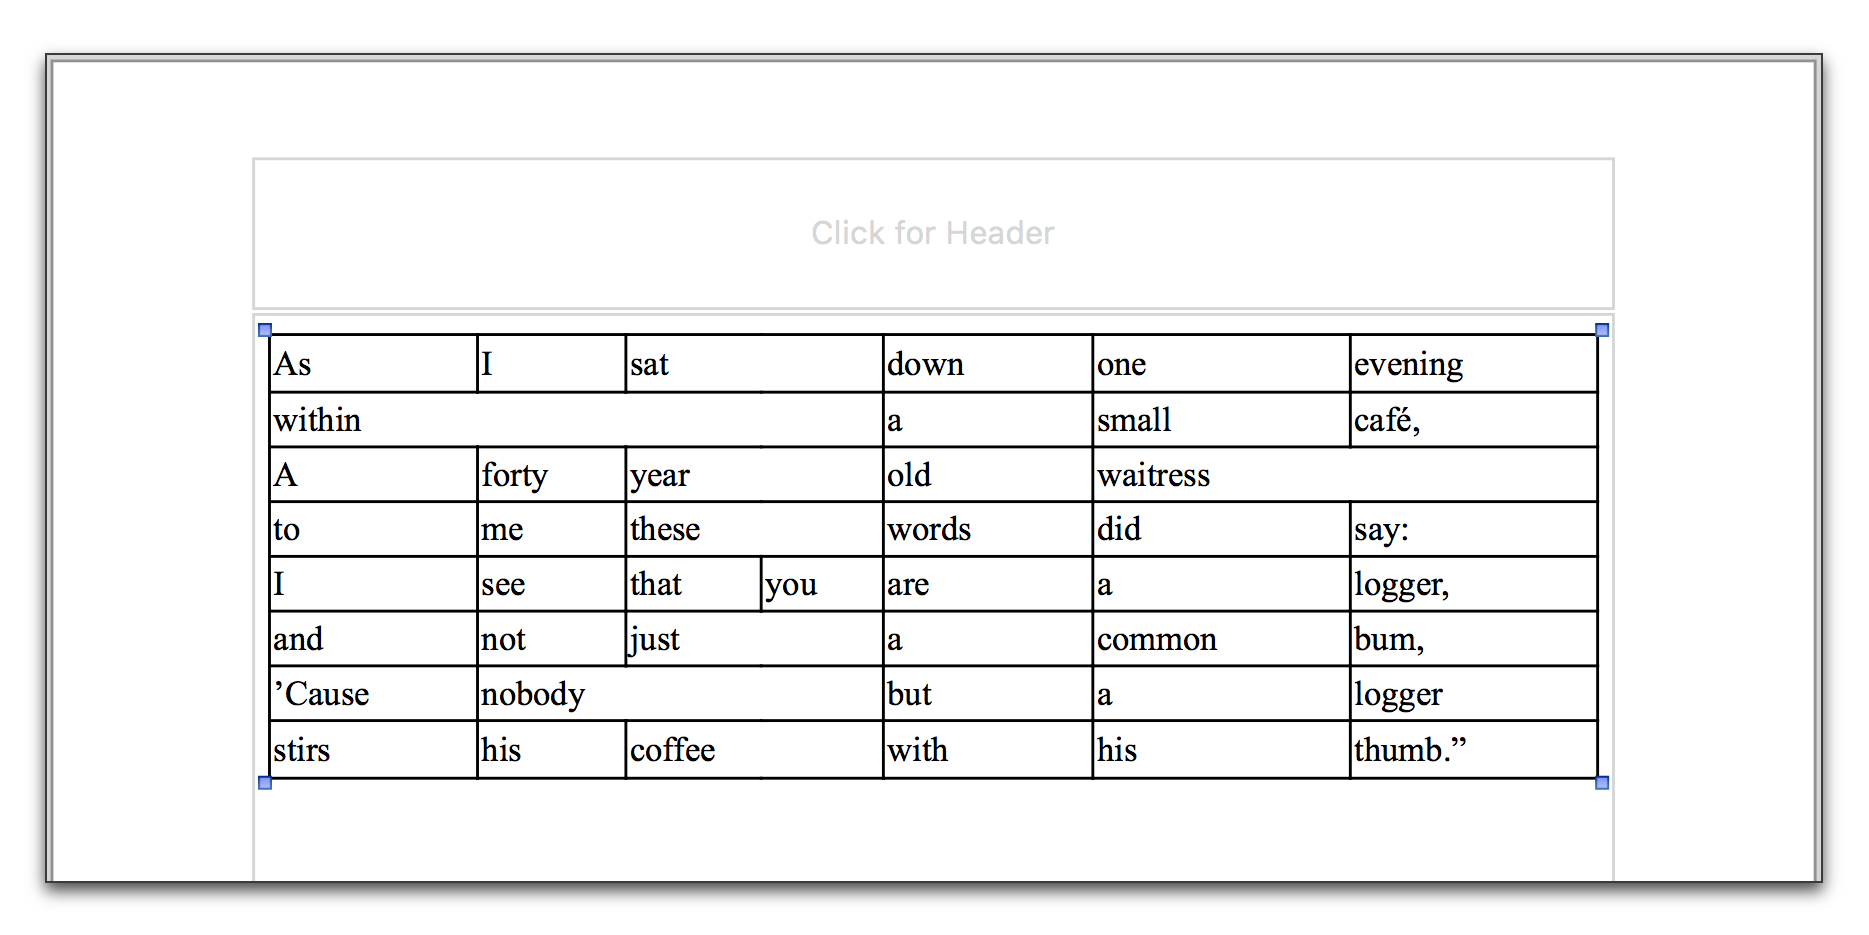
Figure 263
Result of choosing Fit to Page
As with Fit to Contents, Fit to Page does not affect the height of rows unless it causes some wrapped text to “unwrap”.
Tables can have row and/or column headers. However, there is nothing unique about them they are simply either rows at the top that have no (or fewer) cells, or columns at the side that have no (or fewer) cells.
1. Put your insertion point in the top row.
2. Click the Insert Row Above button on the Table palette (as illustrated in Table 13 on page 273), or choose the menu command: Table > Insert > Row Above.
3. Select the cells in the row that you want to make into the header and click the Merge Cells button on the Table Cells palette (as illustrated in Table 13 on page 273), or choose the menu command: Table > Merge Cells.
|
|
|
|
|
|
|
|
|
As |
I |
sat |
down |
one |
evening |
|
|
within |
|
|
a |
small |
café, |
|
|
A |
forty |
year |
old |
waitress |
|
|
|
to |
me |
these |
words |
did |
say: |
|
|
I |
see |
that |
you |
are |
a |
logger, |
|
and |
not |
just |
|
a |
common |
bum, |
|
’Cause |
nobody |
|
|
but |
a |
logger |
|
stirs |
his |
coffee |
|
with |
his |
thumb.” |
Table 20
A table with a row added at the top
You can do a variety of things to make the header stand out. You can learn more about this in the section “Make your tables stand out!” on page 288.
A column header at the top of your table makes a perfect location for a table title.
1. Create a “column header” as explained above.
3. Set the area off with some border or color.
|
The Frozen Logger by James Stevens |
||||||
|
As |
I |
sat |
down |
one |
evening |
|
|
within |
|
|
a |
small |
café, |
|
|
A |
forty |
year |
old |
waitress |
|
|
|
to |
me |
these |
words |
did |
say: |
|
|
I |
see |
that |
you |
are |
a |
logger, |
|
and |
not |
just |
|
a |
common |
bum, |
|
’Cause |
nobody |
|
|
but |
a |
logger |
|
stirs |
his |
coffee |
|
with |
his |
thumb.” |
Table 21
Shows Table 20 above with row made into a “header” (in this case the title)
1. Put your insertion point in the row furthest to the right or left (depending on where you want the header to appear).
2. Click the Insert Column on Right (or Insert Column on Left) button on the Table palette (as illustrated in Table 13 on page 273), or choose Column to the Right or Column to the Left from the menu Table > Insert.
3. Select the cells in the row that you want to make into the header and click the Merge Cells button on the Table Cells palette (as illustrated in Table 13 on page 273), or choose the menu command: Table > Merge Cells.
|
The Frozen Logger by James Stevens |
|||||||
|
1st stanza |
As |
I |
sat |
down |
one |
evening |
|
|
within |
|
|
a |
small |
café, |
||
|
A |
forty |
year |
old |
waitress |
|
||
|
to |
me |
these |
words |
did |
say: |
||
|
2nd stanza |
I |
see |
that |
you |
are |
a |
logger, |
|
and |
not |
just |
|
a |
common |
bum, |
|
|
’Cause |
nobody |
|
|
but |
a |
logger |
|
|
stirs |
his |
coffee |
|
with |
his |
thumb.” |
|
Table 22
Shows Table 21 above with a column made into a “header” (in this case row headers)
Adjust the padding around the contents of a cell
You may want a certain minimum of space between the contents of a cell and the lines that define that cell.
1. Put your insertion point in the cell you want to modify.
2. Click the Padding “stepper” to increase or decrease the amount of padding.
or
3. Select the contents of the Padding field.
4. Enter the value you want.
5. Press ⏎ to confirm your choice.
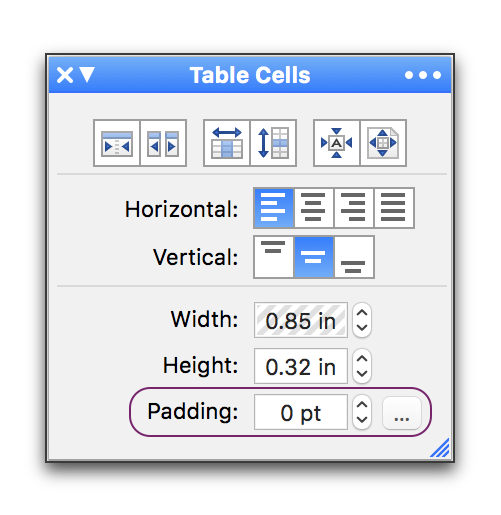
Figure 264
The Padding portion of the Table Cells palette
|
Padding Illustrated |
|
|
Now is the time for all good people to come to the aid of Nisus Software Inc. |
Now is the time for all good people to come to the aid of Nisus Software Inc. |
|
The above cell is fully justified with zero padding. |
The above cell is fully justified with 14 points of padding. |
► Click the ellipsis button to the far right of Padding to open a sheet that enables you to apply a different amount of padding for each edge of the cell as illustrated in
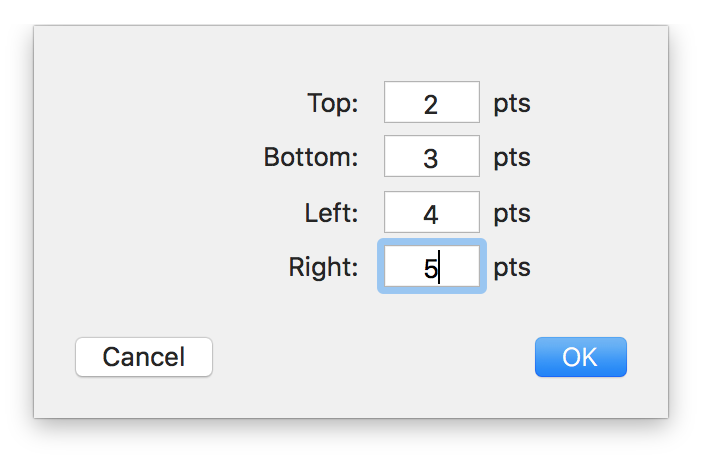
Figure 265
The padding sheet, opened from the ellipsis button of the Table Cells palette set with different amounts for each edge of a cell
☞ Press ⌘ when you click a palette stepper’s up or down arrow to apply the shown value uniformly to all selected text, instead of adjusting all selected values independently.
You can do a variety of things to cause the contents of your table to stand out. You can modify the lines by changing their thickness, style and/or color. You can change the shading of the inside of the cells by modifying their patterns and colors.
Modify the lines (edges, borders, etc.) of a table
Every line of a cell can have its own thickness, style and/or color. Whenever you click your insertion point inside a table, the buttons on the Table Cell Borders palette which represent the existing lines of that cell are highlighted. Other buttons, representing the lines that you can add to that cell (or group of cells) are indicated as enabled (dark black). Buttons that represent lines that you cannot add to the cell (or group of cells) are subtly grayed.
☞ And one button to rule them all illustrated in Figure 266!
Clear the selection of lines to modify
► Click the Deselect All button.

Figure 266
The Deselect All button
► Use the button in the upper left of the Table Cell Borders palette to clear all selected buttons.
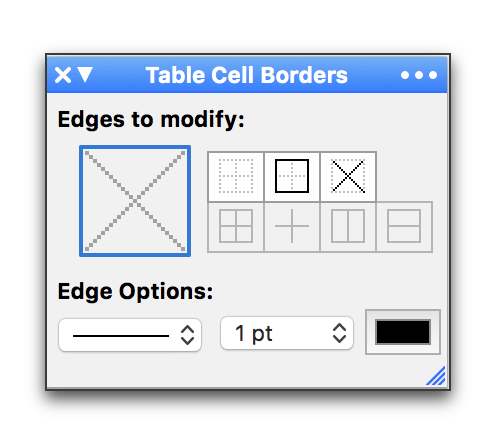
Figure 267
The Table Cell Borders palette
1. Put your insertion point in the cell (or select the cells) you want to modify.
a. Click to select the buttons of the lines you wish to modify.
or
b. Click to select or de-select individual lines in the large square in the upper left area of the Table Cell Borders palette.
|
Table Cell Border Palette Buttons |
||||
|
Top Row |
|
|
|
|
|
Deselect All |
Perimeter of Selected Cells |
“X”s of Selected Cells |
||
|
Bottom Row |
|
|
|
|
|
Border of Each Selected Cell |
Lines Between Each Selected Cell |
Perimeter & Vertical Lines Between Each Selected Cell |
Perimeter & Horizontal Lines Between Each Selected Cell |
|
Table 24
The Table Cell Borders palette buttons
☞ The edges that will be modified by subsequent actions (for example changing their color) are only those represented (turned on: appear blue) in the large square in the upper left area of the Table Cell Borders palette.
Determine the style (pattern) of the lines
1. Put your insertion point in the cell (or select the cells) you want to modify.
2. Click to select the buttons of the lines you wish to modify.
3. Choose the style you want from the pattern pop-up menu of the Table Cell Borders palette
You can choose between none, and a wide variety of styles.
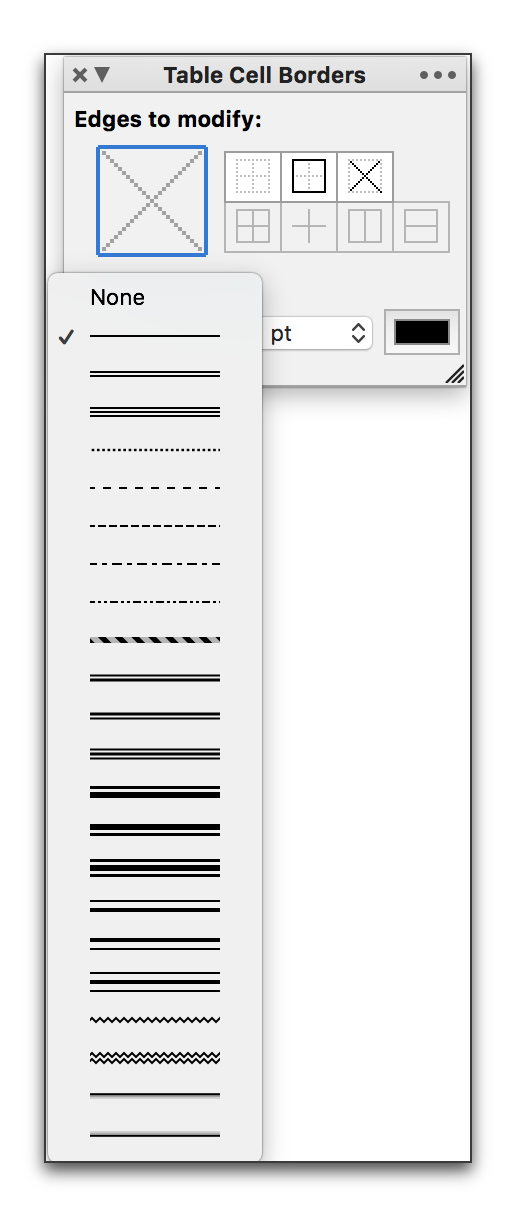
Figure 268
The style pop-up menu of the Table Cell Borders palette
Determine the thickness of the lines
1. Put your insertion point in the cell (or select the cells) you want to modify.
2. Click to select the buttons of the lines you wish to modify.
3. Choose the thickness you want from the thickness pop-up menu of the Table Cell Borders palette
You can choose between None, Hairline, ½ pt (point), ¾ pt up to 8 pt thick lines.

Figure 269
The thickness pop-up menu of the Table Cell Borders palette
When these lines do not appear (if you have set their thickness to None), Nisus Writer Pro displays the color you set for the “Table guides” option in the Appearance Preferences.
Determine the color of the lines
1. Put your insertion point in the cell (or select the cells) you want to modify.
2. Click to select the buttons of the lines you wish to modify.
3. Click the Color Picker tool and choose a color from the Colors panel as illustrated in Figure 383 on page 439.
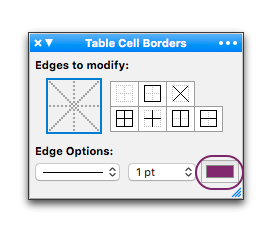
Figure 270
The Color Picker tool of the Table Cell Borders palette
Set the shading (color) of cells
Every cell can have its own shading, style and/or color.
|
Using Gradients and Shading |
|||
|
|
There |
Less |
|
|
Here |
|
|
More |
Table 25
A table showing horizontal and vertical gradients as well as shading
Whenever you click your insertion point inside a table the Pattern pop-up menu and the Colors buttons on the Table Cells Shading palette become enabled.
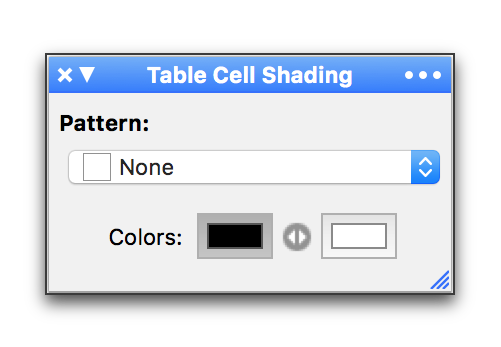
Figure 271
The Table Cells Shading palette in its most simple form
1. Put your insertion point in the cell (or select the cells) you want to modify.
2. Click the Color Picker tool on the left for the foreground and/or on the right for the background and choose a color from the Colors panel as illustrated in Figure 383 on page 439.
Determine the pattern of cells
Every cell can have its own pattern. Each pattern is an “RTF” pattern which gets saved and preserved for display in Microsoft Word.
1. Put your insertion point in the cell (or select the cells) you want to modify.
2. Choose the pattern you want from the Pattern pop-up menu in the Table Cells Shading palette.
☞ A cell with a Pattern set to None can have no color.
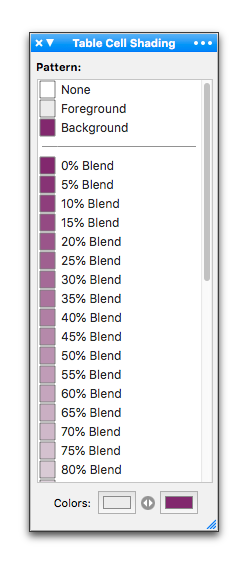
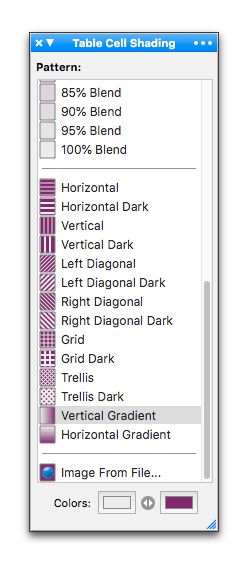
Figure 272
The Pattern menu of the Table Cells Shading palette (in two parts) set for the bottom row, fourth column of Table 25 above (“More” Vertical Gradient)
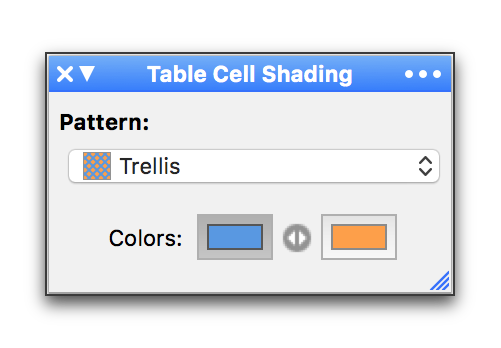
Set the color of the foreground and background of a cell pattern
Every pattern has a foreground and a background. You can choose the color of each of these.
1. Put your insertion point in the cell (or select the cells) you want to modify.
2. Choose the Pattern you want.
In this context “pattern” may mean density of background and foreground.
3. Click the Color Picker tool on the left for the foreground and/or on the right for the background and choose a color from the Colors panel as illustrated in Figure 383 on page 439.
|
The Color of the Foreground and Background of a Cell Pattern |
|
|
|
Trellis Pattern (at 100% blue foreground & 100% orange background) |
|
foreground (at 50% with white background) |
background (at 50% with white foreground) |
Table 26
Setting the background and foreground colors
☞ You can reverse the meaning of the foreground and background color pickers by clicking the double-pointed arrow button that appears between them.
Nisus Writer Pro supports a variety of methods for removing a table from your document. You can use the keyboard, or the mouse or trackpad with the menus. These are described in Table 27 below.
|
|
To Delete a Table |
|||
|
Step 1 |
Step 2 |
Step 3 |
Step 4 |
|
|
Using the menus |
Click anywhere in the table. |
|
|
|
|
Using the Keyboard |
Put your insertion point immediately following the table. |
Press the delete key. |
||
|
Select the range of paragraphs before and after the table. |
Press the delete key. |
|||
|
Click anywhere in the table. |
Press ⌘a to select that cell |
Press ⌘a to select the entire table. |
Press the delete key. |
|
Table 27
Methods for removing a table
You can cut, or copy and then paste a Nisus Writer Pro table anywhere in your document, or in another document.
1. Select the table you want to copy, cut or paste as explained in “Select cells, or portions of… or the entire ” on page 269.
2. Choose Copy or Cut from the Edit menu.
3. Put your insertion point where you want the table to appear and choose the menu command: Edit > Paste.
☞ You can put a table anywhere in your document: in your header and footer, as well as in your footnotes and endnotes. You cannot, however, put a table inside another table, nor can you put a footnote or endnote in a table.
☞ You can remove the contents of any cell by selecting the characters and pressing ⌫ or by choosing the menu command: Edit > Delete, or by choosing the menu Table > Delete > Clear Cell Content. The Clear Cell Content command functions exactly the same as ⌫, except under one situation: when you have selected an entire row or column. ⌫ removes the whole row or column, contents and all, whereas Clear Cell Content will only remove the content from the selected cells, retaining the structure of the table.
Copy the contents, but not the “tableness” of a table
1. Select the contents of the table you want to copy, cut or paste as explained in “Select cells, or portions of… or the entire ” on page 269.
2. Choose the menu command: Table > Copy Table Text.
Find and/or replace a table and/or text in a table
You can find text in your table the same way as in any other portion of your document.
☞ If you want to find text only in the table, select the contents of the table, and then, in the Find & Replace window, choose Tables from the Where pop-up menu before doing your find and/or replace.
While you cannot paste a table into the Find what field of the Find & Replace window, you can paste a table into the Replace with field to replace all found objects with a table. This enables you to add a placeholder for a table in your document and then at a later time replace those placeholders with a specified table that you can edit at will.
| Previous Chapter Footnotes and Endnotes |
<< index >> |
Next Chapter Bookmarks and Cross-references |