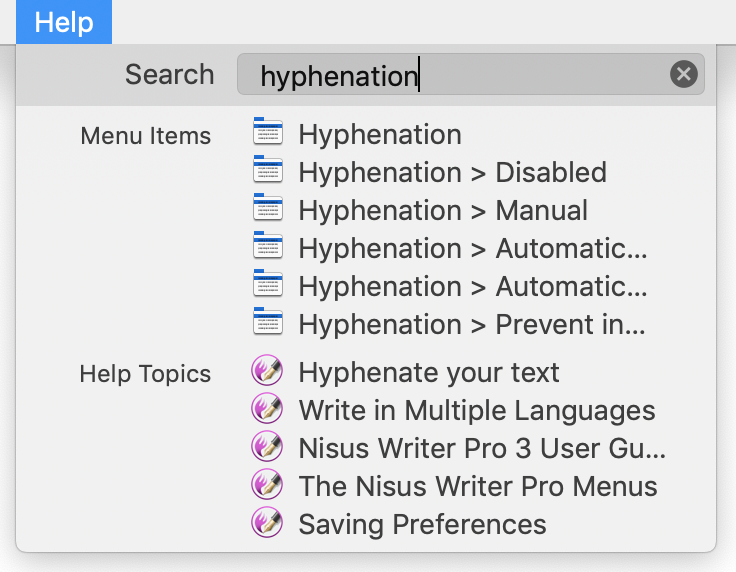
At some point you’ve probably forgotten where a particular menu command is located. The good news is that you can quickly use Nisus Writer’s Help menu search to find it. Just open the Help menu and type a word or two into the search field like so:
The above screenshot shows a search for the word “hyphenation” which turns up the relevant menu commands. You can do two things with the list of matching menu commands:
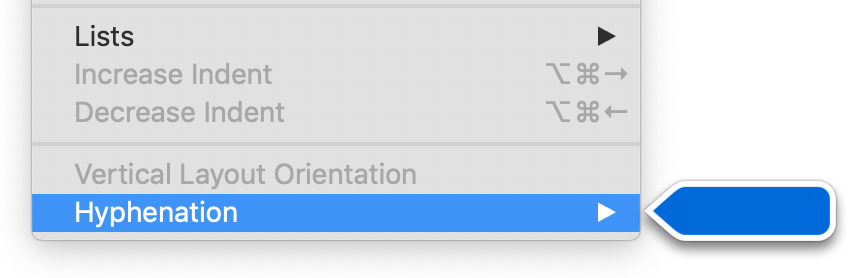
1. Let your mouse pointer linger over the command to see its location in the main menu structure. A large arrow indicator appears like so:
2. Click the command to activate it, as if you’d used it normally.
For an app like Nisus Writer Pro that has a full user guide you will also see a list of associated help topics in the search results. If you click any of those results you’ll be taken directly to the associated help topic in your web browser (Safari by default).
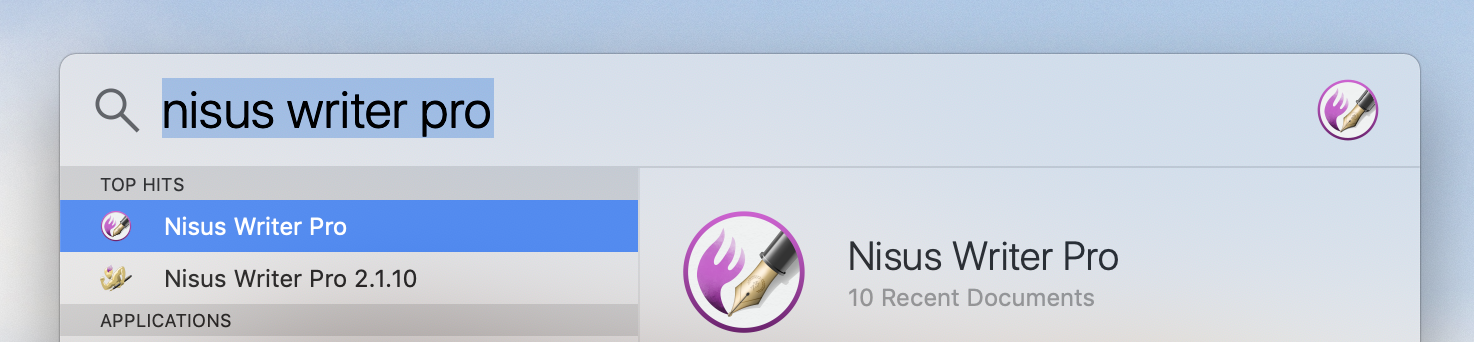
You can use this Help menu search in any macOS apps that support it. It’s relatively standard and nearly all apps from Apple provide it, including Apple Mail, Numbers, Finder, etc.
InfoClick is a great tool for searching and finding email in Apple Mail. However, to get the most out of InfoClick you need to have it analyze and index your email constantly. Also, I’m impatient and I want things when I want them. The best way to do that is to have InfoClick launch at startup so that it can index new emails in the background.
To do this, go to your InfoClick preferences and check “Open InfoClick automatically when you log in.”
Once you do that InfoClick will launch at startup and will be ready to go when you need it.
A question that comes up in support quite a bit is how do you change the default window size?
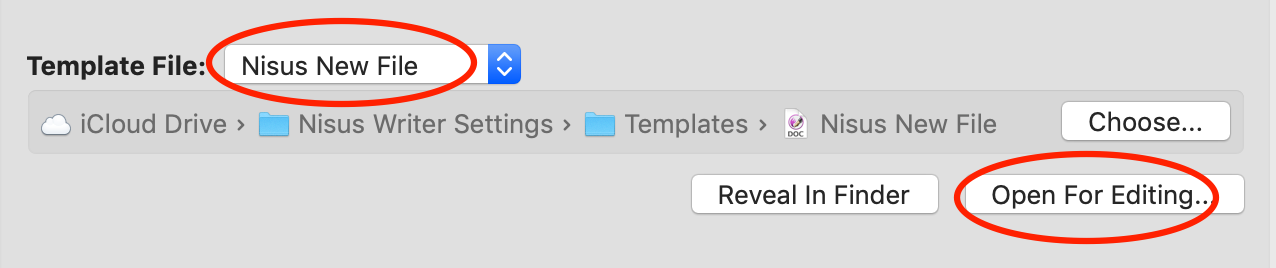
First, a bit of an explanation. Whenever you create a new document in Nisus Writer a template file is loaded. The settings in the template file are used for the new document. This template is called the “Nisus New File”. To control the default window dimensions and placement you’ll want to edit the Nisus New File template so the window appears how you’d like.
Open your Nisus Writer preferences.
Switch to the “New File” pane.
Click the “Advanced” tab.
Under “Template File” where you see “Nisus New File”, click the button “Open For Editing”:
The new file template will open as a normal Nisus Writer document.
Make any desired changes, eg: resize and reposition the window on screen.
Save the changes to disk, eg: using the menu File > Save.
Close the template document.
Once you’ve edited the template all new files will load your updated settings from that template. This includes not only the window size and placement, but all other settings like styles, default view, etc.
We hope this tip is helpful. If you have a tip of your own to share, or any suggestions or comments, please let us know. We’d love to hear from you!
If you’re like me you have more than one document open at a time. Controlling that gets messy, and I’ve often wished that I could have a tabbed interface like my browser of choice. Thankfully you can. That’s because macOS Sierra introduced a tabbed interface that almost any application can use.
Tabs work almost exactly like they do in Safari. If you have several windows open you can use the Merge All Windows command under the Window menu, where Tab-specific menu items reside. Doing so will merge all open documents into a single window with multiple tabs. Command-T opens a new tab, as does clicking the “+” button. Dragging a tab rearranges the tabs, and dragging the tab off the tab bar moves the document into its own window.
We have verified this new Sierra specific feature works in both Nisus Writer Express and Pro. In fact, this should work on many apps, as this feature is system wide.
So if you want to reduce open window clutter, this new feature is for you.
A Nisus Writer Pro user wrote to us asking if there was a way to resize an image and keep its proportions. I reached out to our support team for an answer.
Sometimes you want to resize an image to adapt to the space available. You can do that in Nisus Writer Pro by holding down the shift key while resizing an image. This will maintain the aspect ratio.
Thank you for the tip, support team! If you have questions or have a tip you would like to share, please write to us at tips@nisus.com.
A few months ago James Tummins, a long time Nisus user, convinced his friend to purchase Nisus Writer Pro. Being new to Nisus Writer Pro his friend asked if there were any video tutorials available. Not finding any, James asked if we would object to a few independently produced videos.
Two months later James has created a series of video tutorials for Nisus Writer Pro. These tutorials walk you through subjects such as styles, find and replace, table of contents, track changes, comments, and more.
If you are new to Nisus Writer Pro or need a refresher, these videos are a great resource.
Please let us know what you think by commenting below, posting in our forums (registration required) or sending us an email.
Now that we have released Nisus Writer Pro 2.1.1 (NWP) we would like to update you on our efforts to add Pro 2.1.1 to the Mac App Store (MAS).
We tried very hard to add Nisus Writer Pro 2.1 and 2.1.1 into the MAS. Unfortunately, we are having technical problems with Apple’s developer tools. Currently we are unable to even submit application updates to Apple for review. However, we are working with Apple developer technical support to resolve these issues. Unfortunately we have no idea when NWP 2.1.1 will finally be available in the Mac App Store.
In the meantime, Nisus Writer Pro 2.1.1 will allow MAS customers to use version 2.1.1 by following these steps:
Do not delete the MAS copy of NWP from your Mac. Leave it in its existing location (most likely the Applications folder).
Download NWP version 2.1.1 (download the .zip version only).
Unzip Pro 2.1.1 and leave it on your desktop. Do not put it in the same folder as the Mac App Store version or it will overwrite that version.
Launch NWP version 2.1.1.
Choose the menu Nisus Writer Pro > Licenses…
Click the button “Enter License…”
NWP will try to automatically detect and import your MAS receipt from the Applications folder.
If NWP does not automatically detect your MAS receipt, you will need to hold down the Command key when clicking the “Enter License” button in step #5. That will trigger NWP to guide you through the process. Once you’ve successfully imported your MAS receipt, you no longer need the copy of NWP obtained from the MAS.
Hopefully we will work through the problems with Apple and get Pro 2.1.1 into the MAS soon. Here’s hoping!
Here is a time saving tip for any InfoClick user. InfoClick adds a command (Find Email Using InfoClick) to the services menu in Apple Mail that merely opens the InfoClick search window. You can use OS X to assign this a keyboard shortcut, so it’s fast to jump straight to InfoClick.
“Hi Nisus: How do I get a running word count without having to go through tools etc and add to the end of the text…”
Good question. I have a good answer I hope.
You can put the word count in every new document by editing the Nisus New File. The header or footer are great places for this kind of information. To do this, follow these easy steps:
Launch Nisus Writer Pro preferences (Nisus Writer Pro > Preferences…).
Click on New File > Advanced > Open For Editing.
In the Nisus New file click on the header and choose Insert > Automatic Number > Word Count.
Insert the word count into the header or the footer and save the Nisus New File.
From then on every new document will have the word count placed in the header or footer.
I should say that if you don’t want to do this another solution is to use the statistics palette as a floating palette. Just grab the palette’s title and drag it to the desktop. Either way, both solutions are good and useful.
If you have a suggestion for a tip or a trick write to us at comments@nisus.com. We would love to hear from you.
If you would like to see more tips and tricks subscribe to the Nisus Newsletter.
Did you know that you can create a custom toolbar item? You can associate almost any Nisus Writer Pro command with an icon of your choosing and add it to the Toolbar. You can put a picture of your dog, Elvis, a favorite drawing, a pirate flag, or just about anything you would like to use. It’s easy to do, and here is how:
Choose the menu command View > Tooldrawer > Add Custom Toolbar Item….
Choose a command from the Add Custom Toolbar Item browser.
Give the toolbar item a (shorter) name if you want by typing it into the field labeled “The name of the new toolbar item.”
Scroll through the available icons (from Nisus Writer Pro and Mac OS X) and select one that you want. Or, click the Gear menu to the right of “Choose an icon for the toolbar item” and select your custom image.
Click Add Item.
The new icon appears in the upper left edge of the Toolbar, and the lower right corner of all the icons available for the Toolbar in the Customize Toolbar sheet. The Add Custom Toolbar Item dialog remains on top enabling you to add more custom icons before you determine their location on the Toolbar.
Continue adding items if you want or click Done.
Move the icons from the Customize Toolbar sheet to where you want them on the Toolbar and click Done.
If you tire of your custom item, you can remove it easily:
Click on the icon in the toolbar and Right-click (or Control-click) your custom item in the toolbar.
Choose Remove Item from the contextual menu that appears.
I had been thinking it was about time we updated the FAQ section on our site. Before any of us could act, however, Martin beat us to the punch by adding a couple of entries and while he was at it, updated four topics.
Long ago, in the days of the Classic Mac OS, when Nisus Software Inc. first developed its tools for multilingual software, on the shores of the Pacific Ocean, we learned some interesting facts about Arabic poetry. Not only, unlike English and most other European languages, does Arabic not hyphenate words, in its poetic expressions in particular, Arabic “likes” to have its lines spread out to fill the entire space of the column. In most European languages this is accomplished by adding tiny amounts of space between words. However, in Arabic it is done by adding “kashidas” . Beginning in Nisus 3.4x we developed what we called the Full Justify Tab.
The Full Justify Tab of Nisus Writer Classic
As is clear from the illustration above, the Arabic text above the little note “Full Justify Tab” is the same text as appears below. However the text below is controlled by the tab indicator. As you dragged the tab indicator on the ruler (inside the red ring) horizontally to the right or left, the text governed by it squeezed or stretched correspondingly.
Welcome to Mac OS X
The text engine provided by Mac OS X, which Nisus Writer Pro and Express use, does not support justified tabs. Our Arabic users have repeatedly requested that we do something to alleviate their pain.
Teamwork Leads to a Solution
With the helpful testing of Nisus Writer Pro user Kamran, our lead engineer Martin prepared a set of macros that solve the problem of justifying Arabic text.
The first step is to install the “fully justify” macros. You’ll only need to do this once. Here’s what to do:
1. Download the justification macros.
2. They come in a compressed archive, which you may need to double click in the Finder to expand.
3. Switch to Nisus Writer Pro (NWP).
4. Use the menu Macros > Load Macro.
5. In the open file dialog, choose the files you downloaded/expanded earlier (eg: “Justify Fully Arabic”). You can select all the macros at once. Click the “Open” button.
From now on these macros will always be available on your Macros menu and you can safely trash the files you download.
Once you’ve typed up some poetry:
An Arabic poem (before)
1. Select the paragraphs of text you want to fully justify.
2. Use the menu Macros > Justify Fully Arabic.
When the macro is done running, your text should appear fully justified.
An Arabic poem (after)
One final note: these macros work by inserting kashida characters into your writing. It may be that you later want to go back and edit what you’ve written- having these kashidas may make that awkward. To remove them select the relevant text and use the menu Macros > Justify Fully Arabic (remove kashidas).
A Gift for English Writers As Well
While he was working on the Arabic task, Martin was able to accomplish a similar task for English poetry. The zipped collection of macros contains two additional macros: Justify Fully English and Justify Fully English (remove spaces). William Shakespeare might have used them if he had been able to write using Nisus Writer Pro.
Sonnet 18 (before)
Sonnet 18 (after)
We hope that all your writing “nisus” will be a pleasure with Nisus Writer Pro.
This tip came from one of our engineers, Martin, who writes on this blog from time to time.
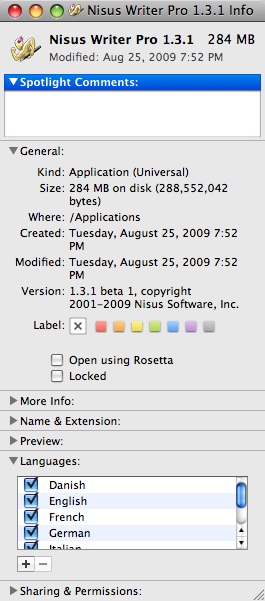
In previous versions of Mac OS X a user could use “Get Info” in the Finder to control which localization(s) a particular application was launched with, eg: they could disable all but one localization to force an application GUI into a certain translation.
This is no more. Snow Leopard removed the feature and doesn’t appear to have an equivalent.
A user can now only:
1. Adjust the list of languages in the system preferences so that the desired language is first (or at least appears before other available localizations). Note this affects all applications, system wide.
2. Manually open up a single application package and trash the unwanted localizations from the Resources folder.
Mac OS X 10.6 brings a great deal of refinement, stability, and goodwill since the price is so low. However, we have discovered a couple of interesting issues that should be discussed.
The native file format in both Nisus Writer Express and Pro is RTF (rich text format). This format is shared by many other applications, including TextEdit and Apple Mail. It has been this way since the inception of OS X. We chose this format because it is supported by just about any word processor out there. Prior to Snow Leopard, files that were created in Nisus Writer Express or Pro would always reopen in the originating application.
However, Apple has changed this behavior in 10.6. All RTF files, regardless of where they were created, will open in a single application. By default the Finder is configured to use TextEdit. Obviously, this is not good for our users and us. It will be confusing and upsetting, and frankly we aren’t very happy about it. However, this behavior can be changed in a few easy steps.
In the Finder, single click a Nisus Writer RTF file.
Choose the menu File > Get Info.
Under “Open with” choose Nisus Writer.
Click the “Change All” button.
All RTF files will now be opened by Nisus Writer.
The other issue is more straightforward. Rosetta, the technology that was introduced with the introduction of Intel Macs to translate PowerPC applications on the fly, does not come installed by default. This is a potential issue because the file translators we use to open .doc documents, for example, are coded for PowerPC. When you try to open a document that needs the file translator you may see an alert that will ask you to install Rosetta. If you click the “Install” button, Rosetta will then install and Nisus Writer (Express or Pro) will work as before.
Or, to avoid that alert, when you are installing Snow Leopard for the first time click on the “Customize” button and choose Rosetta.
By default, Express (and Pro, when it ships) has US English as the default language. But, you live in the United Kingdom. You don’t want to spell in our crazy version of English! You want to spell color the proper way, as in colour. How do you set this up in Express/Pro? In this example, we will choose Nisus Writer Pro. However, this also works in Express.
Simple, Simon. You set the language in the Nisus New File.
1. Choose Preferences from the Nisus Writer Pro menu.
2. Click New File in the bar across the top.
3. Click Format (if it is not already selected) in the tabs at the top of the New File preferences.
4. In the Character portion of the dialog choose English (British) from the Language pop-up menu. If you do not see this language in your list, you can add it by opening Preferences>Languages and clicking the More… button.
5. Close the Preferences window.
6. Choose New from the File menu.
Now type a word in “proper†English, say neighbourhood. The spelling checker should not flag that word.
Disclaimer: This tip applies to new documents only.
(Thanks to Mark Hurvitz, Nisus support person and many other titles, for this tip.)