Nisus Writer Pro offers you several ways to save a document.
You can ignore saving your documents entirely. Nisus Writer Pro, along with the Mac system, as explained in “Save Files” beginning on page 74 automatically saves all your work.
While Nisus Writer Pro uses the Mac system automatic save facility, you can override this and set the frequency with which the application saves your files.
1. Choose the menu command: Nisus Writer Pro > Preferences > Saving.
When you first open Nisus Writer Pro it is set to use the rules determined by macOS and the text-edit field to the right of Time between autosaves reads Automatic.
2. Click in the field and type the number of minutes Nisus Writer Pro waits between autosaves, or,
3. Click the stepper to its right to increase or decrease the time.
Nisus Writer Pro can keep track of your files in the Document Manager as explained in “Document Manager” beginning on page 80.
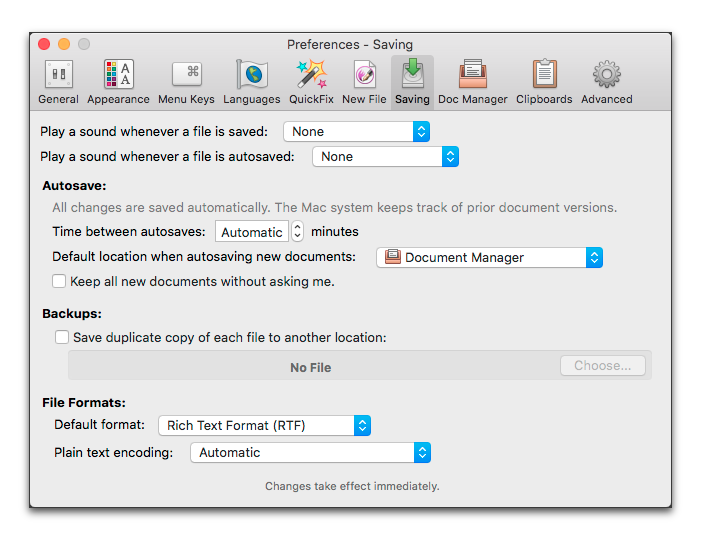
Figure 513
The Saving section of the Preferences dialog
Be notified whenever you save a file
You can have Nisus Writer Pro play a sound whenever a file is safely stored on disk:
1. Use the menu Nisus Writer Pro > Preferences > Saving to open the preferences.
2. Choose the sound you want from either of the two pop-up menus:
a. Play a sound whenever a file is saved.
b. Play a sound whenever a file is autosaved.
These are initially set to None so you are not notified.
You can use the Choose… option from the pop-up menu to select any sound available your computer.
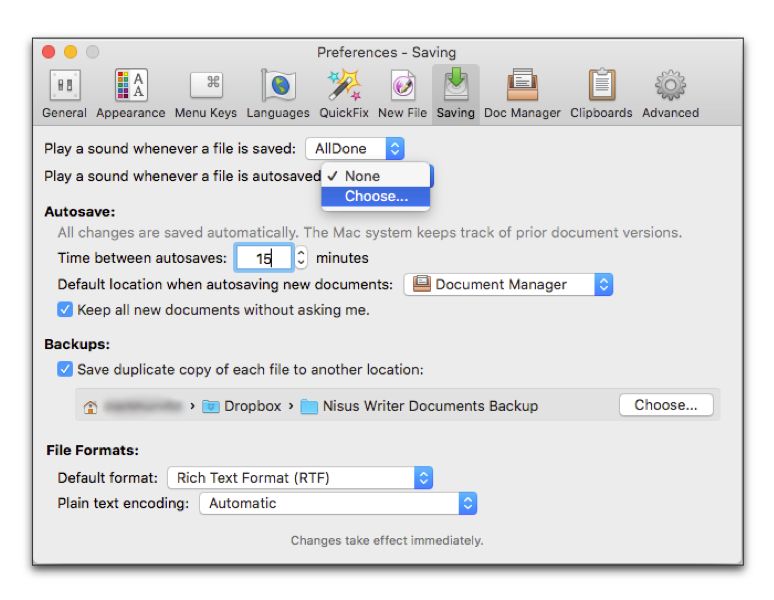
Figure 514
A sound selected for explicit saves & the pop-up menu open, ready to choose a sound for autosave
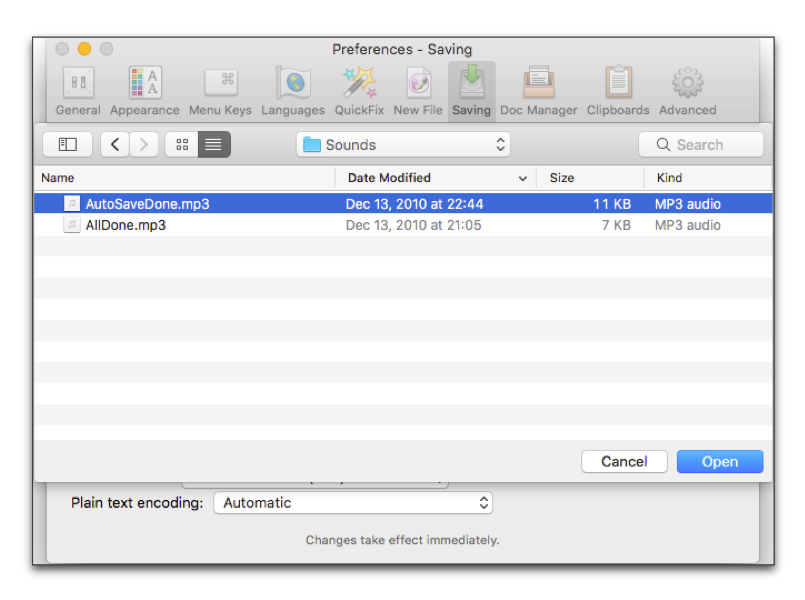
Figure 515
The variant of the Open dialog with a sound selected for autosave
Once you have saved your file and given it a name, the macOS continues to automatically save your file without your intervention. The Mac also stores earlier versions of your documents which you can examine and or revert if you want as explained in the section: “Document versioning” on page 603.
Nisus Writer Pro can jump-start the saving process so that you don’t ever need to see the Save As dialog.
Set the interval between automatic saves
1. Choose the menu command: Nisus Writer Pro > Preferences > Saving.
2. Enter the Time between autosaves in the text-edit box, or use the steppers to increase or decrease the interval (in minutes).
When you first start using Nisus Writer Pro the “interval” is set to “Automatic”. This means that the interval is completely controlled by the macOS.
Save files automatically and never see the Save As dialog
1. Choose the menu command: Nisus Writer Pro > Preferences > Saving.
2. Checkmark Keep all new documents without asking me.
Nisus Writer Pro will create a title for your document based on the first few words of the document. The rules Nisus Writer Pro uses to name a file are, in order of priority for naming:
• text marked in a Title or Heading style;
• text that is centered or larger or bold or marked for the table of contents;
• text in longer paragraphs are given the lowest priority.
When you close the window Nisus Writer Pro will not ask if you want to save the file, but, will close the file and save any changes to your default autosave location.
For more information about saving files see “Save Files” on page 74.
Set the desired location for your autosaved files
You can determine where you want your autosaved files to collect.
1. Choose the menu command: Nisus Writer Pro > Preferences > Saving.
2. Choose the location you want from the pop-up menu to the right of Default location when autosaving new documents. The options include:
◦ Dropbox (if you have an account)
◦ or you can select Choose Folder… which opens a variant of the Open dialog enabling you to set any location on your hard drive(s).
The default autosave location may be your Document Manager folder. You can independently choose the Document Manager folder location as explained in “Determine the location of your Document Manager folder” on page 83.
☞ You can easily find and open these documents using the Document Manager illustrated in Figure 67. (Choose the menu command: Window > Document Manager and open the file you want.)
Generally it’s best to use macOS autosave to maintain prior versions of your documents, along with a Time Machine backup to an external hard drive. That way if there’s a problem with your main hard drive you are protected by redundancy.
However, Nisus Writer Pro can also keep a duplicate of every file you save in an alternate backup folder.
1. Choose the menu command: Nisus Writer Pro > Preferences > Saving.
2. Under the Backups area of the preference pane, checkmark the option:
Save duplicate copy of each file to another location
3. Click the Choose button to select any folder on any attached hard drive.
If you have an alternative backup location configured, but the location is not available at the time of your save (maybe because an external hard is not connected), Nisus Writer Pro alerts you. As illustrated in Figure 516 you can choose to either:
◦ Use the moment to attach the missing drive and Try Again;
◦ Decide to click Choose Folder… to save the file in a different secondary location.
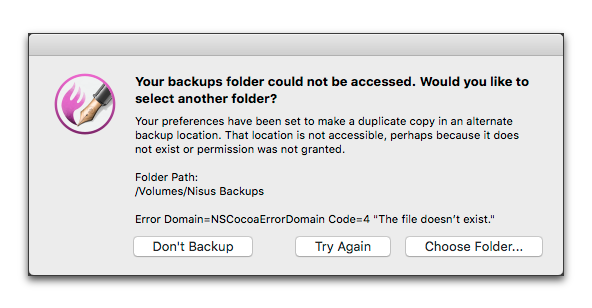
Figure 516
The Missing Backup Folder alert
Formats and encoding of saved files
Set the preferred format for saved files
You can choose the particular standard format for the files you create and save
Most of these encoding systems are to maintain compatibility with older file formats). If you do not understand what this is, you can feel free to ignore it. If you wish to learn more about the subject, check the “Glossary of Useful Terms” on page 705.
► From the Default format pop-up menu of the File Formats portion of the Saving preferences, choose either
◦ Rich Text Format Directory (RTFD)
◦ Nisus Compressed Rich Text13
You can override this preference when you save a file if you choose Save As….
Set the preferred encoding for saved files
► From the Plain text encoding pop-up menu of the File Formats portion of the Saving preferences, choose either
◦ International formats: Automatic; UTF-8 (recommended), UTF-16, ASCII;
◦ Mac OS Only formats: Arabic, Central European, Cyrillic, Greek, Japanese, Hebrew, Icelandic, Korean, Simplified Chinese, Traditional Chinese, Turkish, Western (Mac OS Roman);
◦ Windows Only formats: Arabic (Windows), Central European (Windows Latin 2), Japanese (Windows, DOS), Korean (Windows, DOS), Latin-US (DOS), Simplified Chinese (Windows, DOS), Traditional Chinese (Windows, DOS) Western (Windows Latin 1);
◦ ISO Standards formats: Central European (ISO Latin 2), Central European (ISO Latin 4), Cyrillic (ISO 8859-5), Greek (ISO 8859-7), Japanese (ISO 2022-JP), Turkish (ISO Latin 5), Western (ISO Latin 1), Western (ISO Latin 3);
◦ Other formats: Japanese (EUC), Japanese (Shift-JIS), Western (NeXTStep).
You can override this preference when you save a file if you choose Save As….
Nisus Writer Pro uses macOS autosave to save your documents as you work. The system stores multiple copies of every document using prior autosaves. That is, if a particular file is autosaved multiple times, the system keeps multiple copies of that same file from different points in time. A single autosaved copy of your file is called a document version.
To see a list of all document versions for a file:
1. Open the desired file in Nisus Writer and ensure its document window is frontmost.
2. Choose the menu File > Versions > List All Versions…
The Document Manager window will appear showing a list of all available versions for that file.

Figure 517 The version history listing in the Document Manager.
From the Document Manager listing you can inspect modification dates and other metadata. A version that is exactly equal to the version that came afterwards (temporally) will be listed as a Duplicate.
The buttons below the listing allow you to save a copy of a version elsewhere, or to open a version as document window in read-only mode. Once a prior document version is opened you can inspect it at your leisure using all the tools available in Nisus Writer. Read-only mode prevents accidental editing, preserving your version history.
The menu File > Versions also lists some versions and allows you to quickly open them in read-only mode, without first summoning the Document Manager. The menu does not list all versions, only those that might be of most interest, like the oldest version or those versions made at the start or end of a day.
If you don’t want to work through the Document Manager, the menu File > Revert To provides a way to quickly restore prior document versions. This menu may list one or two recent versions at the top along with file dates like so:
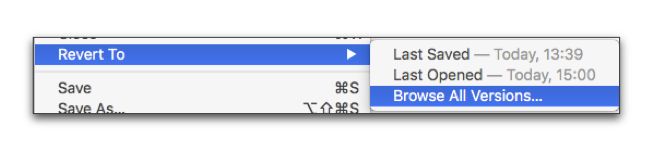
Figure 518
The Revert To submenu showing a few recent versions.
The contents of this menu are controlled by macOS. It doesn’t always seem to show the last opened or last saved versions. If you choose one of the versions from the top of this menu that version will be restored, replacing the current version of your file.
⚠️ Reverting a version in this way is immediate; your current version of the document is supplanted. It’s probably better to first review the version using the version browser or version listing.
Apple also provides a way to browse document versions interactively. You can examine, restore, or copy content from these prior versions. Here’s how you can inspect earlier versions of your document:
1. Open the desired file in Nisus Writer and ensure its document window is frontmost.
2. Choose the menu command: File > Revert To > Browse All Versions…
You will enter a mode similar to Time Machine. The current version of the file appears on the left side of your screen, while all previously saved versions appear on the right side. You can observe the date and time of each version beneath its document window.
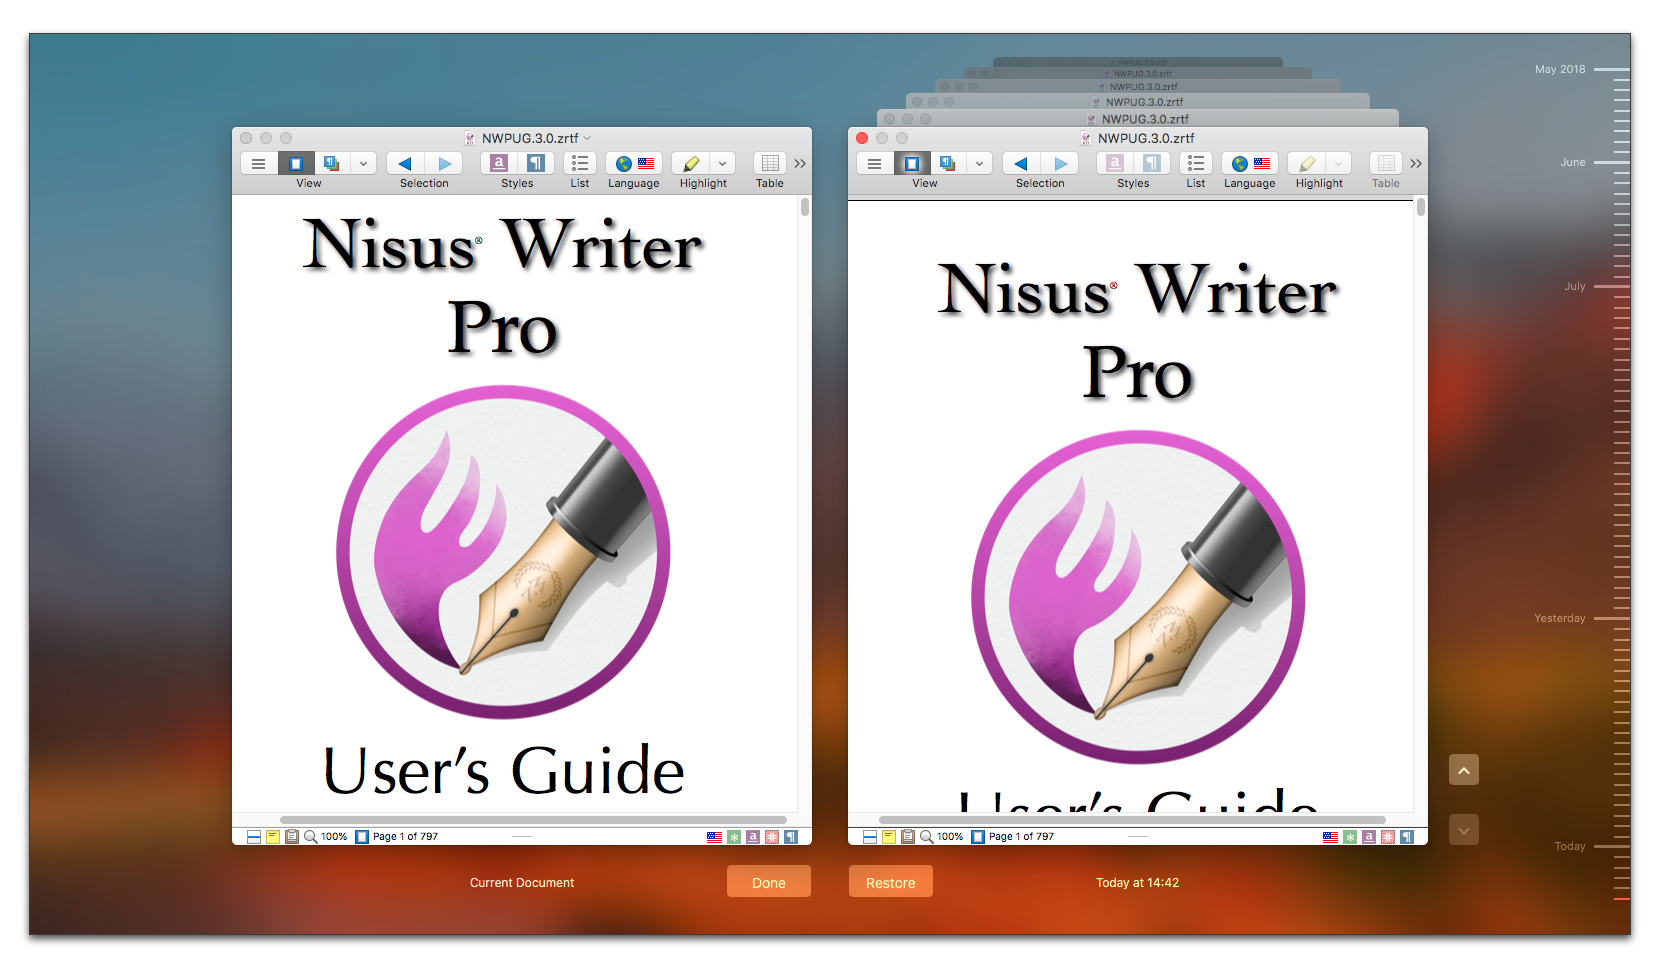
Figure 519
Browsing all versions at first opening
Once in this mode you can switch between older versions using the timeline along the right side of the screen. Clicking a hashmark on the timeline will load a version from that specific date, so that version appears topmost in the version pile on the right. You can also click the up and down buttons to move to the next or previous available version.
In this state the document windows are “live” — you can scroll, zoom, open and close sidebars, etc — all independent of the current version. You can even select and copy text, which remains available on the clipboard after you exit the browser. You cannot, however, use the find tools of Nisus Writer Pro (though the Navigator sidebar is very helpful), nor, or course can you edit the old version.
☞ Because the Nisus Writer Pro window is made narrower (constrained) to make room for the two versions of the document, your best results in viewing the current version will be achieved if you display it at 100% zoom and any ancillary content (or sidebars) closed.
If you decide you want to replace the current version of your document with an older one, click the Restore button under the desired version. Alternatively click the Done button to make no changes and exit the version browser.
You can use the Document Manager to delete prior versions of your file that have been autosaved by macOS.
How to delete prior document versions:
1. Show the Document Manager version listing, as described in the section “List prior document versions”.
2. Select one or more versions in the file listing.
3. Press the Delete key on your keyboard, or click the Delete button.
→ A warning alert appears asking you to confirm the deletion.
4. Click the Delete Permanently button to delete the selected version(s).
⚠️ This operation is not undoable and the files are not moved to the Trash. If you choose to delete old versions they will be deleted permanently and immediately. There is no way to cover them.
Aside from all the contents of your file, Nisus Writer Pro also saves the following so that it opens with
• show page guides (on or off)
• correct spelling as you type (on or off)
• document view (Draft View, Page View, etc.)
• selection or insertion point position
• Navigator and Comments/Tracked Changes sidebar and/or split settings (right/left, top/bottom, open/closed)
• Track Changes state (on or off)
• window zoom percentage
• scroll location
• whether typewriter scrolling and/or synchronized scrolling is enabled
• focus mode
• what “margin icons” are visible (annotation, ruler, and style icons)
• what special markings to print (page guides, invisibles, annotations)
• hyphenation mode
☞ The Toolbar appears or not according to how you had set the most recently opened window. The Palette Dock appears or not based on what you choose in the preferences as explained on page 588.
| Previous Chapter New File Preferences |
<< index >> |
Next Chapter Determine the Way the Document Manager Works |