In addition to the basic styles of Bold, Italic, Underline (both single and double), Superscript and Subscript (the latter two both in the menu Format > Baseline), Nisus Writer Express offers Strikethrough (both single and double).
Remove Formatting and Styles, as its name suggests, is not a style, but a command: “Remove existing style formatting and make this text plain (the formats set in the New File preferences… your Nisus New File)!”
1. Select the text you wish to change.
2. Choose the menu command: Format > Remove Formatting and Styles.
This removes all style formatting, including color. What remains are the formats you set in your Nisus New File in the New File preferences.
☞ This removes all formatting (both character and paragraph, but not “List” styles) from, and applies the “Normal” style to selected text.
☞ This does not remove any language attribute associated with the selected text.
Change the height of text in relation to the baseline
1. Select the text you wish to change.
2. Choose Superscript or Subscript from the menu Format > Baseline.
☞ You can alter the height of this text in one-point increments by choosing Raise or Lower from the menu Format > Baseline.
Return raised or lowered text to the baseline
1. Select the text you wish to change.
2. Choose the menu command: Format > Baseline > Use Default Baseline.
Increase or decrease the height by a specific amount
1. Select the text you want to raise or lower.
2. Choose the Raise Baseline By… or Lower Baseline By… from the menu Format > Baseline.
3. Type the number for the amount you want the height to change.
The amount is cumulative; that is each time you choose this command and enter a number the amount is added to or subtracted from the height already applied.
Cause letter pairs to use ligatures
Ligatures (characters in certain fonts (such as fl) consist of two or more letters or characters joined together). Various fonts support more or fewer ligatures.
For example in the font Apple Chancery, the letters “f” followed by “i” and “f” followed by “l” appear differently depending on whether or not ligatures are turned on or off.
Without ligatures turned on the letters are separated:
f [space] i, or without the space: fi
f [space] l, or without the space: fl
With ligatures turned on the two characters appear as one glyph. Note how the crossbar of the “f” continues to the “i” and the top of the “f” appears a bit lower and touches the top of the “l”:
fi fl
Each font handles these phenomena in its own way.
1. Select the text you wish to change.
2. Choose Use Default or Use All from the menu Format > Ligature.
Prevent letter pairs from using ligatures
1. Select the text you wish to change.
2. Choose the menu command: Format > Ligature > Use None.
Cause letter pairs to display closer together or further apart
1. Select the text you wish to change.
2. Choose Tighten to squeeze text together, or Loosen to spread text further apart, from the menu Format > Kern.
Kerning affects all characters selected, that is the inter-character space following the character to which it is applied.
|
Kerning Illustrated |
||
|
Not Kerned |
Tightened (by 15) |
Tightened More (by 30) |
|
Kerning affects all characters selected. Audio Visual abbreviated: “AV“ |
Kerning affects all characters selected. Audio Visual abbreviated: “AV” |
Kerning affects all characters selected. Audio Visual abbreviated: “AV” |
|
Loosened (by 15) |
Loosened More (by 30) |
|
|
Kerning affects all characters selected. Audio Visual abbreviated: “AV” |
Kerning affects all characters selected. Audio Visual abbreviated: “AV” |
|
Table 26
Kerning options compared
Increase or decrease the amount of kerning by a specific amount
1. Select the text you want to kern.
2. Choose Tighten By… or Loosen By… from the menu Format > Kern.
The sheet illustrated in Figure 264 appears.
Figure 264
The tighten kerning by twips sheet
A “twip” is one-twentieth “tw” of a point “pt”.
3. Type the number for the amount you want the size to change.
The amount is cumulative; that is each time you choose this command and enter a number the amount is added to the amount of kerning already applied.
☞ If you do not have an actual selection, adjusting the kerning alters the spacing between the adjacent characters.
Prevent letter pairs from displaying closer together or further apart
1. Select the text you wish to change.
2. Choose the menu command: Format > Kern > Use None.
1. Select the text you wish to color.
2. Choose the color you want from the menu Format > Text Color.
If one of those colors does not match your desired palette:
3. Choose the menu command: Format > Show Text Colors.
4. Use the various options to have your text display in the color you want.
► The easiest way to change colored text back to black is to choose Remove Color from the menu command: that pops up from the Color tag on the Status Bar.
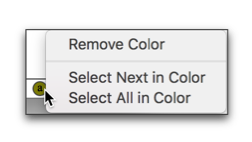
Figure 265
The Color tag and its menu
You can “highlight” sections of your text as with a “highlighting” marker pen as illustrated in Figure 111 on page 124.
1. Select the text you wish to highlight.
2. Click the Highlight button.
☞ The Highlight button on the Toolbar indicates the current highlight color, that is, the color which will be applied when you click it (the button), not the highlight color of any selected text. The color of selected text appears in the Highlight tag in the Status Bar.
Highlight text using a color other than the current color
1. Select the text you wish to highlight.
2. Choose the color you want from the Highlight button menu or from the menu Format > Highlight.
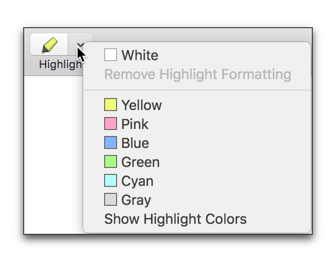
Figure 266
The Highlight button and its menu
Remove highlight color from your text
1. Select the text from which you wish to remove the highlight.
2. Choose Remove Highlight Formatting from the Highlight button menu or from the menu Format > Highlight, or, choose Remove Highlight from the Highlight tag menu on the Status Bar.
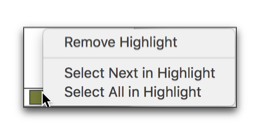
Figure 267
The Highlight tag and its menu
☞ This highlight of text prints. It is different from the selection “Highlight Color” that you set in the Appearance window of your System Preferences and the background Check Spelling and Find/Replace Highlight Color you set in the Nisus Writer Express General preferences as explained in “Set “Defaults” for the Application” on page 352.
You can set a printable background color for any selection of your text. This color also gets saved and displays in HTML documents.
1. Select the text you wish to add background color.
2. Choose the color you want from the menu Format > Background Color.
Background color only draws in areas actually occupied by characters (excluding indents, line wraps, etc. though including spaces and tabs).
Remove background color from your text
1. Select the text from which you wish to remove the background color.
2. Choose the menu command: Format > Background Color > Remove Background Color Formatting, or, choose Remove Color from the Background Color tag menu on the Status Bar.
How highlight color and background color differ
Highlight color and Background Color differ only slightly
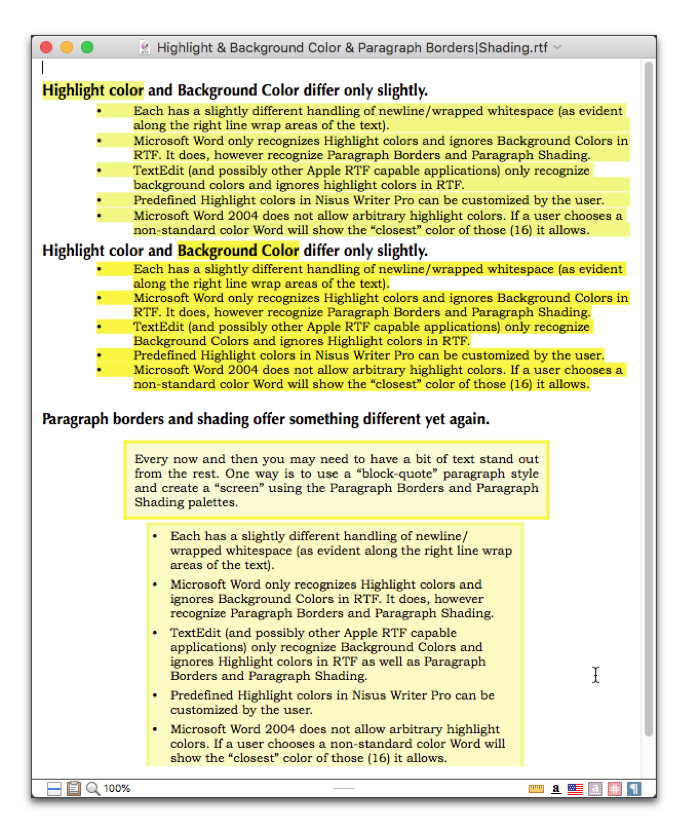
Figure 268
Highlight color, Background Color and Paragraph Borders with Paragraph Shading compared
• Each has a slightly different handling of newline/wrapped whitespace (as evident along the right line wrap areas of the text in Figure 268 above).
• Word only recognizes Highlight colors and ignores Background Colors in RTF. It does, however recognize Paragraph Borders and Paragraph Shading.
• TextEdit (and possibly other Apple RTF capable applications) only recognize Background Colors and ignores Highlight colors in RTF as well as Paragraph Borders and Paragraph Shading.
• Predefined Highlight colors in Nisus Writer Express can be customized by the user.
• Microsoft Word 2016 does not allow arbitrary highlight colors. If a user chooses a non-standard color Word will show the “closest” color of those (16 illustrated in Figure 269) it allows.
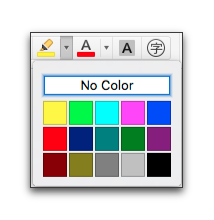
Figure 269
Highlight color palette in Microsoft Word 2016
The Colors panel illustrated in Figure 270 on page 301 is not part of Nisus Writer Express, but the Mac OS. The area of little white squares below the color circle is a space where you can “store” favorite colors.
► Drag the color from the large bar of color (in this case a shade of lavender) at the top to any of the squares below.
You can populate the area with quite a number of little color swatches. However, the trick is: how do you remove one of the colors if you no longer want it?
High Sierra makes this more intuitive than dragging a white square into a colored square. Three are two ways you can delete a favorited color swatch.
► Using the keyboard
1. Select a swatch
You'll see it drawn with a focus ring.
2. Press the ⌫ key.
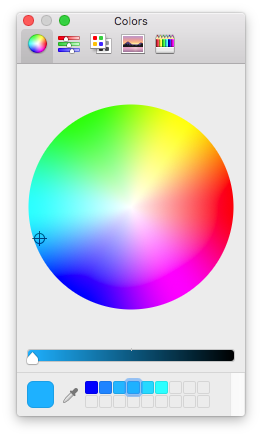
Figure 270
The Colors panel in High Sierra with the fourth swatch from the left selected
► Using the mouse
1. Select a swatch
You'll see it drawn with a focus ring.
2. Drag the swatch to the Trash icon in the Dock.
| Previous Chapter Alphabetize (Sort) Paragraphs |
<< index >> |
Next Chapter Clean Up Documents |