Line Wraps and the Zero-Width Joiner
Sometimes the most exciting thing about an iOS update is all the new emojis. In recent history the new emojis in iOS 13.2 included several interesting characters:


That last one is technically called the Ringed Planet emoji; but let’s get real, that’s Saturn. Even in emoji-form the cosmos is beautiful. These photos of Jupiter taken by the Juno probe are particularly stunning in their detail.
What does this have to do with line wrapping? We’ll get to that. First let’s explain a technical detail about emojis. Most Unicode characters and emojis have a distinct Unicode code point (aka character code). Each code tells software what character to display. The number 127823 is an apple, while 129411 is a turkey. But sometimes a new emoji will not have a new code. Instead the emoji is designated using a composite of existing codes. For example, the female chef emoji does not have a distinct code. Instead it combines the woman emoji with the frying pan emoji:

How does does an emoji do that in text? By using a zero-width joiner character between its constituent characters. That way software knows to display all the codes together as a single glyph or image on screen. This joiner trick is used for a variety of purposes like skin tone and gender modifiers.
Now to the part where we explain how the zero-width joiner character can help your writing. In certain situations you might consider inserting a joiner character to change where line wrapping occurs. The joiner acts as a signal to the text layout engine that the adjacent characters should be joined. You can think of the joiner like a glob of glue that keeps its neighbors together. The characters won’t display a single image as with emoji, but rather they will be kept together on the same line.
Consider the following example text:

The page margins may cause an undesirable wrapping point at the slash, so the words “when” and “if” are split across lines like so:
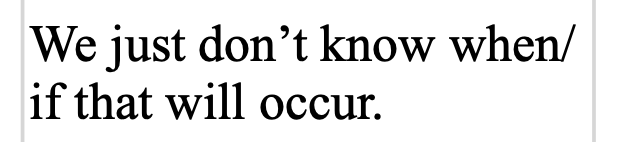
To prevent that you can place the insertion point after the slash character and insert a zero-width joiner character. That instructs text layout to keep the slash character together with the “i” in “if” like so:

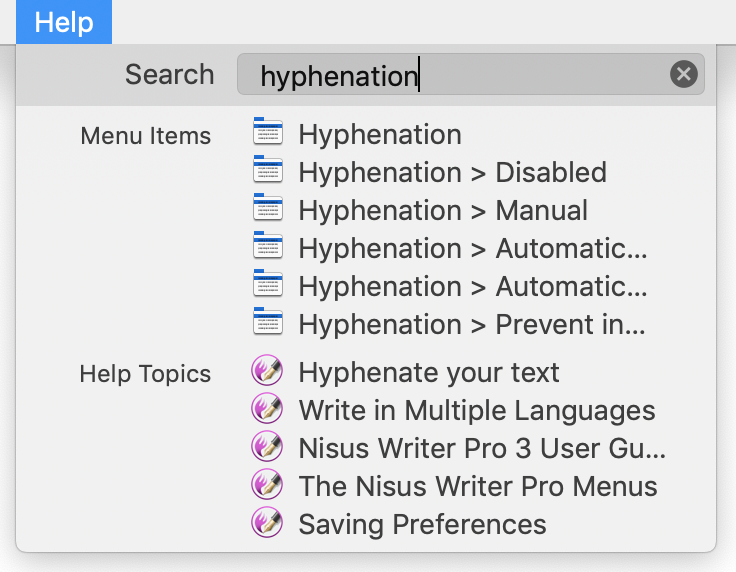
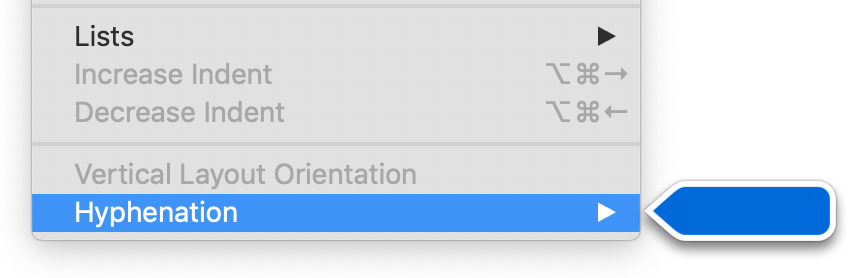
To insert the joiner character in Nisus Writer Pro you can use the menu Insert > Special Character > Spaces > Zero Width Joiner, or use our customizable Special Characters palette.