While an increasing amount of documents are distributed electronically, without paper, and read on screen, periodically you may need to commit your document to paper. The dimensions of your paper are determined in the Page Setup dialog and the margins of the document within the limits of that page are determined on a “per section” basis using the tools of Nisus Writer Express.
Page Setup dialog you see is entirely dependent on the printer you have. The following explanation uses an HP Photosmart C6100 as the “default” printer driver.9
When the Page Setup dialog appears, the dialog displays information and choices specific to the printer to which you have connected your Macintosh. Use this to customize specific printer options.
Set the preferred paper size for all your documents
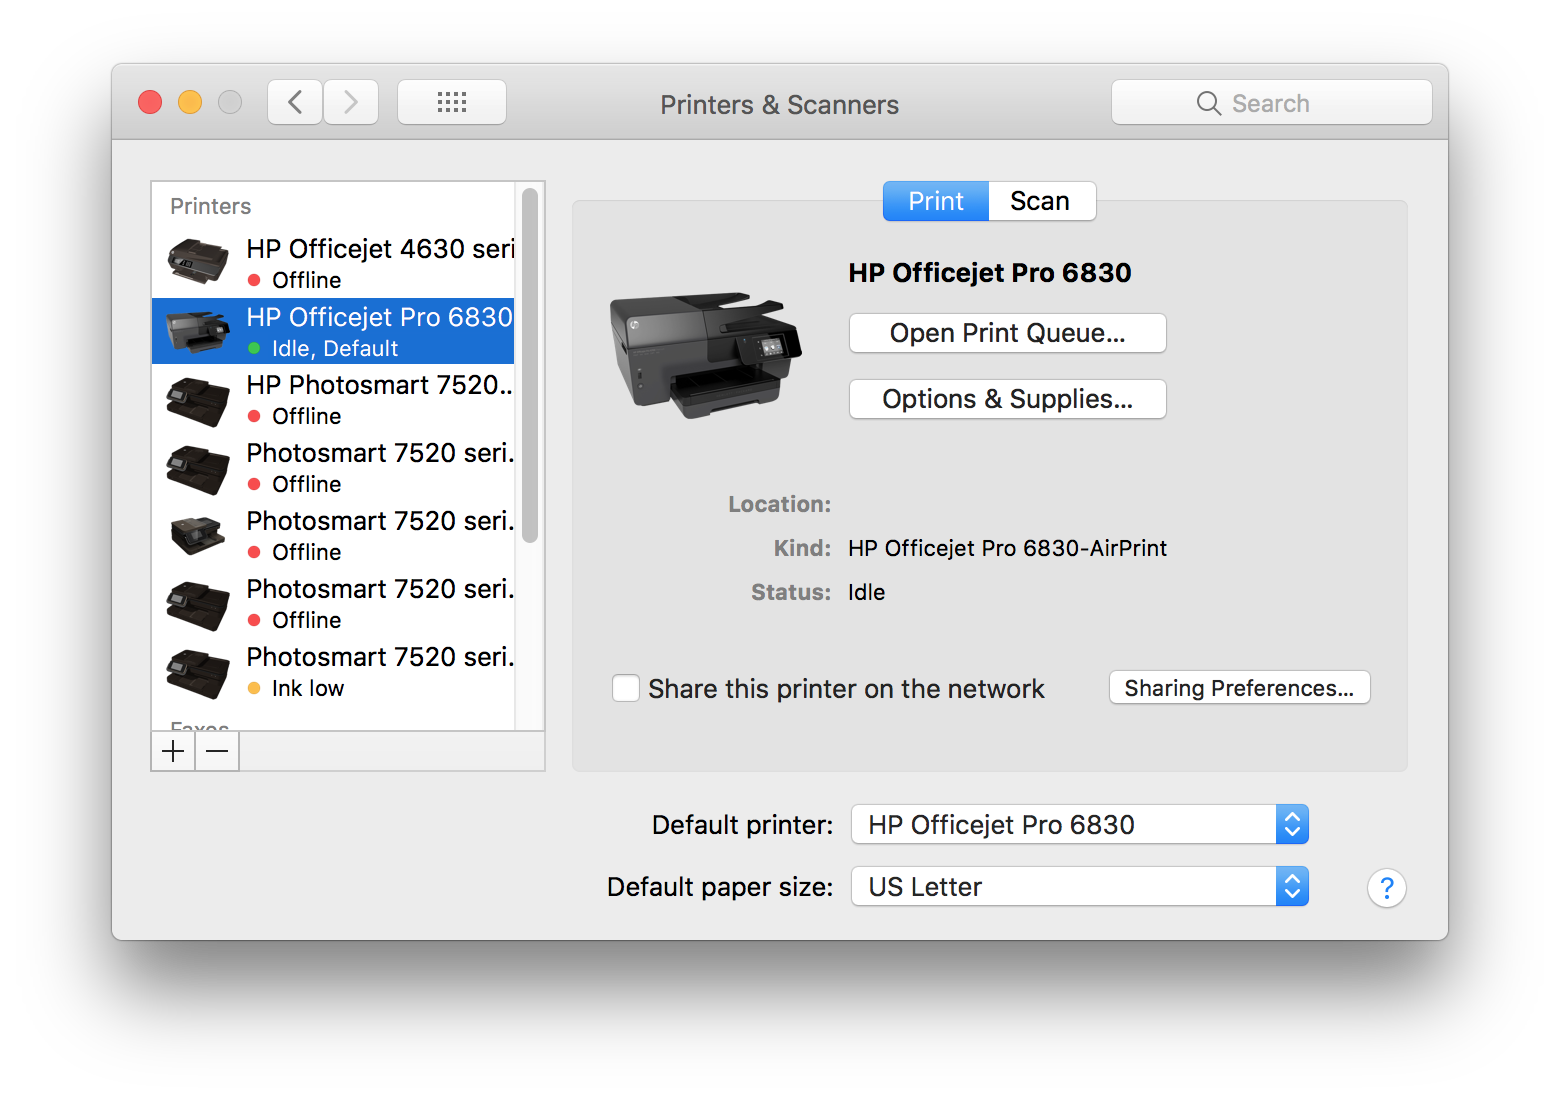
The Printers and Scanners portion of the Mac’s System Preferences enables you to set the paper size for all your documents.
1. Choose the menu command: Apple > System Preferences….
2. Click Printers & Scanners in the second row.
3. At the bottom, choose the format you want from the Default paper size pop-up menu.
☞ The Operating System offers US Letter, US Legal, A4, A5, JIS B5, B5, Envelope #10, Envelope DL, A3, Tabloid Oversize, ROC 16K, Envelope Choukei 3, and Super B/A3. Be aware that your printer may not have these available, even if you can choose them in here.
Figure 141
The Printing portion of the Print & Fax System Preference window of High Sierra
☞ You can override these settings for any document you want in the Page Setup dialog in Nisus Writer Express.
☞ As a convenience Nisus Writer Express will at first pick up the paper size set in this preference. If you want to customize the paper size of new documents, you should edit your Nisus New File as explained in “Edit your Nisus New File” on page 379. In either case you set the paper size in the Page Setup dialog illustrated in Figure 142.
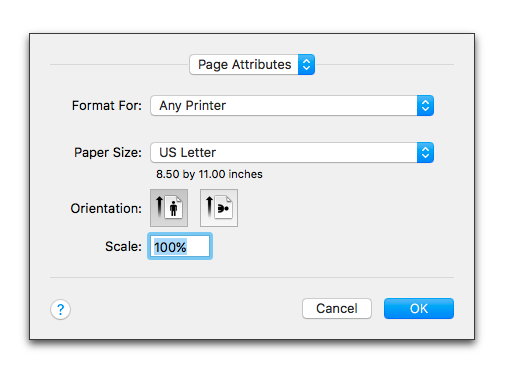
Figure 142
The default page setup dialog
Reduce or enlarge the printed area
The number you type in the Scale box of the Page Setup dialog scales only the text not the page.
► Enter the value you want in the Scale text edit box and click OK.
Determine the orientation of the printed page
1. Choose the menu File > Page Setup….
► Click portrait for standard letter formatting.

Figure 143
Portrait orientation
► Click landscape for greater width than height.

Figure 144
Landscape orientation
☞ Your document can have multiple orientations, one for every section. These will print (to PDF or paper) appropriately.
Set different orientations for different portions of your document
You can rotate any particular page 90º for printing. However you will have to set that page apart as a distinct section in your Nisus Writer Express document.
1. Put your insertion point above the page you want to have rotated and choose the menu command: Insert > Section Break > Next Page. (You may want to make sure it is an odd page and not the back of the current page… your choice.)
2. Put your insertion point in the new page and choose the menu command: File > Page Setup….
3. Set the orientation the way you need it and click OK.
4. Put your insertion point at the end of the text that needs to print rotated and choose the menu command: Insert > Section Break > Next Page. (You may want to make sure it is an Odd page and not the back of the current page… your choice.)
5. Put your insertion point in the new page and choose the menu command: File > Page Setup….
6. Set the orientation the way you need it and click OK.
If your document has multiple sections and you choose Page Setup… a sheet appears illustrated in Figure 145 asking for which section(s) you want to have the settings in Page Setup apply.
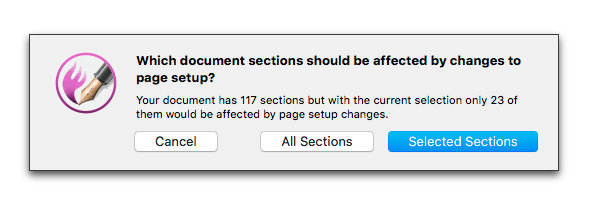
Figure 145
The Multiple Sections Page Setup sheet
The available choices are:
• Selected Sections
This refers to as many or few sections in which your insertion point appears.
• All Sections
This refers to all the sections of your document whether or not your insertion point appears there.
• Cancel
This gives you a chance to return to your document and reflect on your options.
Most paper in the United States comes in either legal or letter size. However you may want to produce a book or some other item with a custom paper size.
1. Choose the menu command: File > Page Setup….
2. Choose Manage Custom Sizes from the bottom of the Paper Size pop-up menu.
3. Follow the interface in the dialog and enter the values you want.
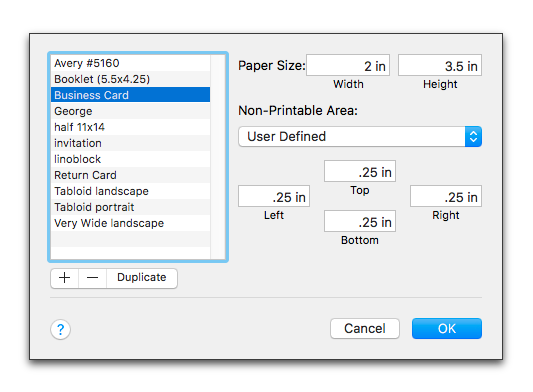
Figure 146
The Custom Paper Size dialog of the Page Setup dialog
Your custom paper size then appears at the bottom of the Paper Size pop-up menu.
Set the margins of the sections of your document
You can set the margins of each separate section of your Nisus Writer Express document in a variety of ways visually, numerically or by “stepping” through pre-set increments.
☞ All controls of your margins are set on a per-section basis. If you have many sections in your document and want to change the margins of the entire document (or a number of sections), either select the entire document and make the changes or select some text in those sections you want to alter before making the changes.
☞ The minimum allowed document margin is 2 points (about 0.03 inches). However, your printer may not be able to print the document as illustrated in Figure 306 on page 346.
Changing the margins of your document is as easy as dragging the line that appears around the printed area to the location you want.
1. Choose the menu command: View > Page View (if your document is not already displayed as a page).
Paper size, margins and line wrap areas are meaningless in Draft View and Full Screen view.
2. Choose the menu command: View > Page Guides > Show Page Guides (if you do not already have the page guides displayed).
☞ To prevent accidentally changing the margins by dragging the page guides choose the menu command: View > Page Guides > Lock Page Guides.
You can change the margins with the Page Guides turned off, but having them on is much easier.
You can print these guides as explained in “Print page guides & “invisibles”” on page 347.
3. Place your pointer over the Page Guide representing the margin you wish to move.
Your pointer changes to a “margin mover” as illustrated in “Mouse cursors” on page 12.
4. Click and drag your pointer (and the Page Guide with it) so that the margin is where you want it.
A “help tag” appears to let you know where your margin is in relation to the edge of the paper.
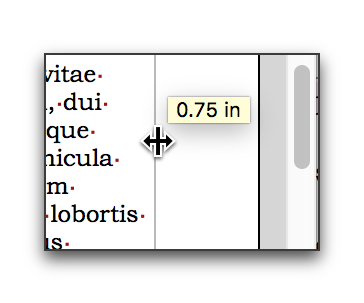
Figure 147
Setting the margins visually
You can change the location of the margins by typing the precise locations you want in the Margins palette of Nisus Writer Express. Because you make these changes numerically and not visually, you do not need to have your document displayed in Page View to proceed so you can see the result.
1. Open the Palette Dock and select the Sections palette group from the icons at the top, or, choose the menu command: Window > Palettes > Floating Palettes > Margins.
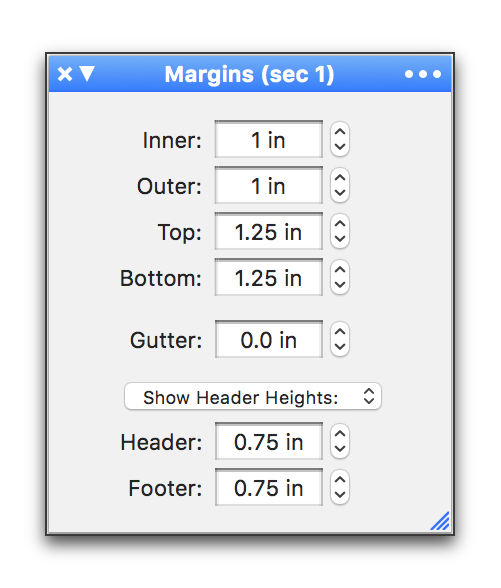
Figure 148
The Margins palette showing the margins for the shipped Nisus New File
◦ The terms Inner and Outer refer to the edge of the paper closest to the binding and to the outer edge (if there would be a binding).
◦ The terms Top and Bottom refer to the margins of the body of the document, that is the distance from the actual top or bottom of the page, independent of the header or footer (if they should appear).
◦ The terms Header and Footer refer to the outermost edge at the top and bottom of your page that your printer will support.
Choose Show Header Heights and think of the footer as starting at the bottom of the main body text area, and the “height” expanding downward from there. For the header, and this is somewhat counterintuitive, the header starts at the top of the main body area, and expands upwards from there. Put another way, the bottom of the header is its start point as far as measuring its extent (height) goes.
Choose Show Header Insets and the same thing happens: the bottom of the header is locked to the top of the main body area, and the top of the footer is locked to the bottom of the main body area. It's merely the opposing edge whose inset you are choosing (e.g.: you control the inset for the top edge of the header).
As an example, illustrated in Figure 149 below, this document has a header height of 0.39 inches and a footer height of 0.0 inches (footers are hidden). However, its header inset is 0.45 inches and footer inset is 0.55 inches.
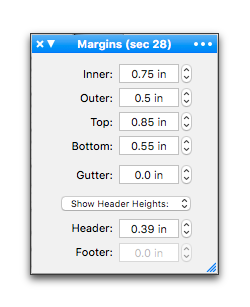
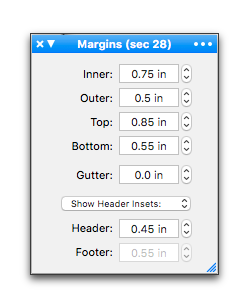
Figure 149
The Margins palette showing the header and footer heights and insets for the current section of this document
◦ Gutter refers to the inside margins or blank space between two facing pages of a magazine or book. This space is allowed due to the area lost in binding.
2. Double-click your insertion point inside whichever field you want to change and enter the value required.
3. Press ⇥ to continue to the next field or ⇧ ⇥ to reach the preceding field.
☞ This sets the margins of all selected sections to the actual figures entered in the various fields.
Set the margins by “stepping” through pre-set increments
You can change the location of the margins by clicking the “steppers” in the Margins palette of Nisus Writer Express. Because you make these changes numerically, but by increments, you might want to have your document displayed in Page View before you proceed so you can see the result.
1. Open the Palette Dock and select the Sections palette group from the icons at the top, or, choose the menu command: Window > Palettes > Floating Palettes > Margins as explained in “Set the margins numerically” on 162.
2. Click the “stepper” as illustrated in Figure 27 on page 27 until you arrive at your desired value.
“Steppers” increase and decrease in increments of the measurement Units you set in the View portion of your New File preferences:
◦ .10 cm
◦ .10 inches
◦ .10 mm
◦ .10 pc
◦ .10 pt
☞ Press ⌘ when you click a palette stepper’s up or down arrow to apply the shown value uniformly to all selected text, instead of adjusting all selected values independently.
You may want to print your document for binding so that the text appears on both sides of a piece of paper. In that case you would probably want your margins to “mirror” or “reflect” depending on whether they are on the odd or even page.
1. Open the Palette Dock and select the Sections palette group from the icons at the top, or, choose the menu Window > Palettes > Floating Palettes > Section as explained in “Set the margins numerically” on 162.
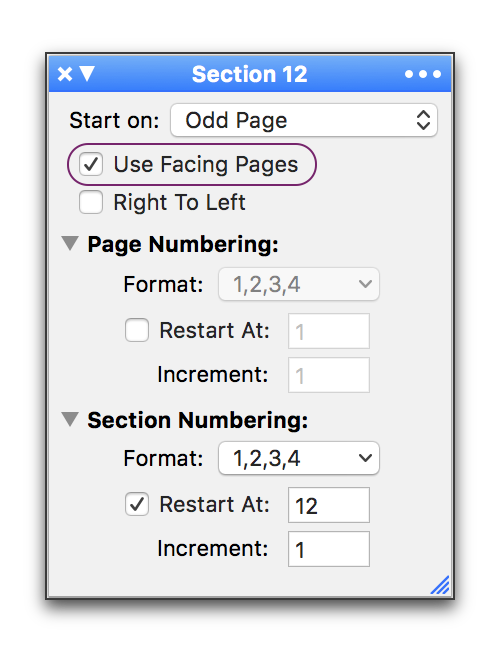
Figure 150
The Section palette showing Page, and Section Numbering options
| Previous Chapter What Happens When You Choose New From the File Menu |
<< index >> |
Next Chapter Set the Number of Columns |